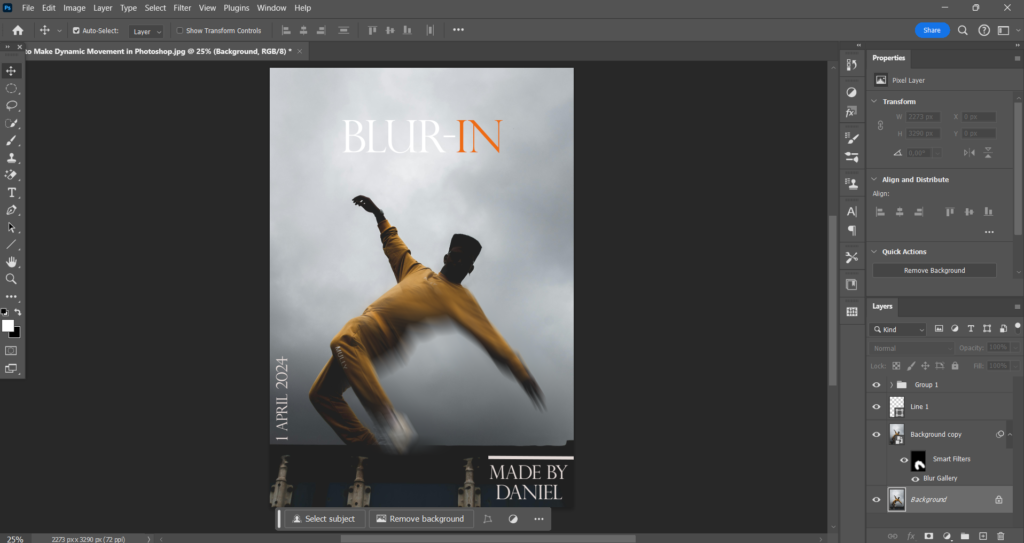
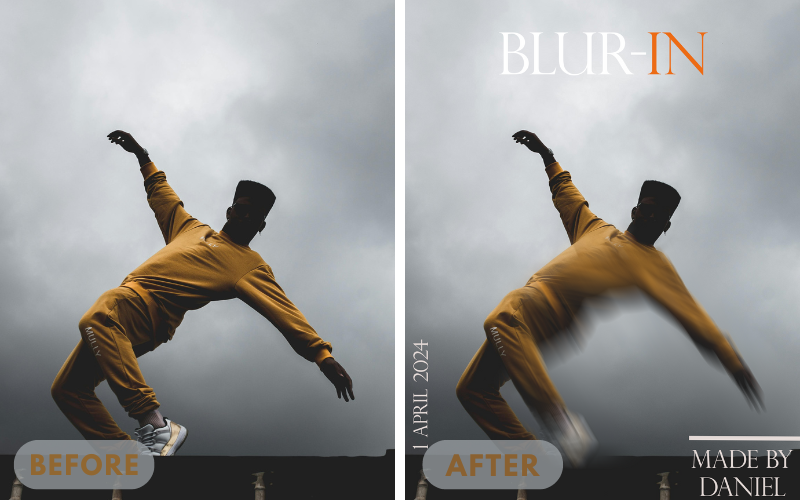
Whether you’re an experienced graphic designer or just a beginner creating a dynamic movement effect in Photoshop is pretty tricky. That’s why I jumped on my chair and dived deeply into this topic.
From what I have seen and read, not many people know how to do this and that’s exactly why should learn this skill.
Knowing how to do this will make you stand out in your competition and a lot of other positive things will come your way as well.
It’s just a skill that has only positive side effects if you use it right. You remember when I said that not many people know how to do this.
Many people also assume that you can’t create this effect. That’s how special this effect really is. So let’s not waste time anymore and jump right into this tutorial.
How to Make Dynamic Movement in Photoshop
Step 1: Duplicate your layer (Optional)
You can duplicate a layer by right-clicking on the original layer and selecting (Duplicate Layer). The reason why you should do this is because duplicating the layer creates a copy of your original image.
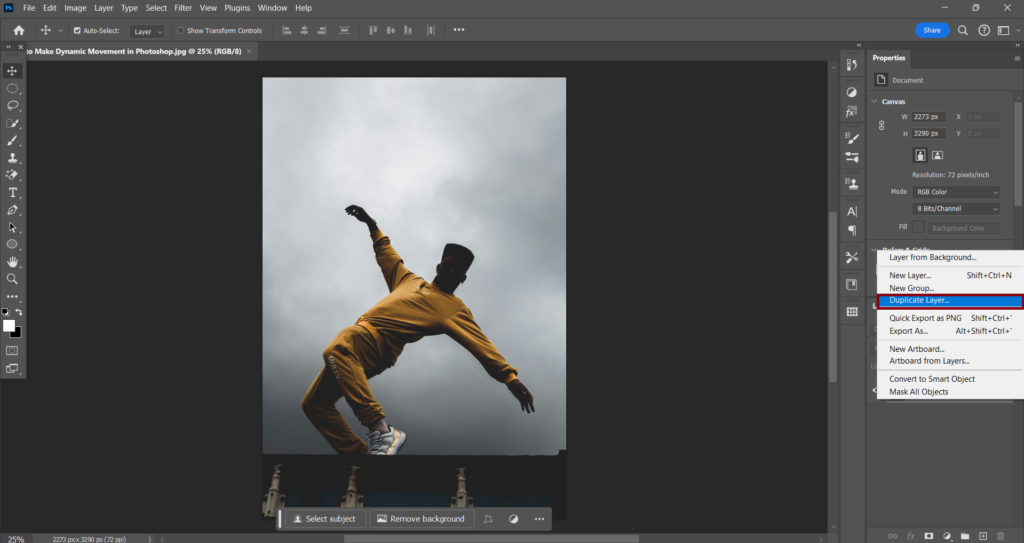
This copy serves as a backup, keeping your original image safe in case anything goes wrong while you’re adding the dynamic movement effect.
Step 2: Convert the layer to a smart object
You can convert your layer to a smart object by right-clicking on the layer and selecting (Convert to Smart Object).
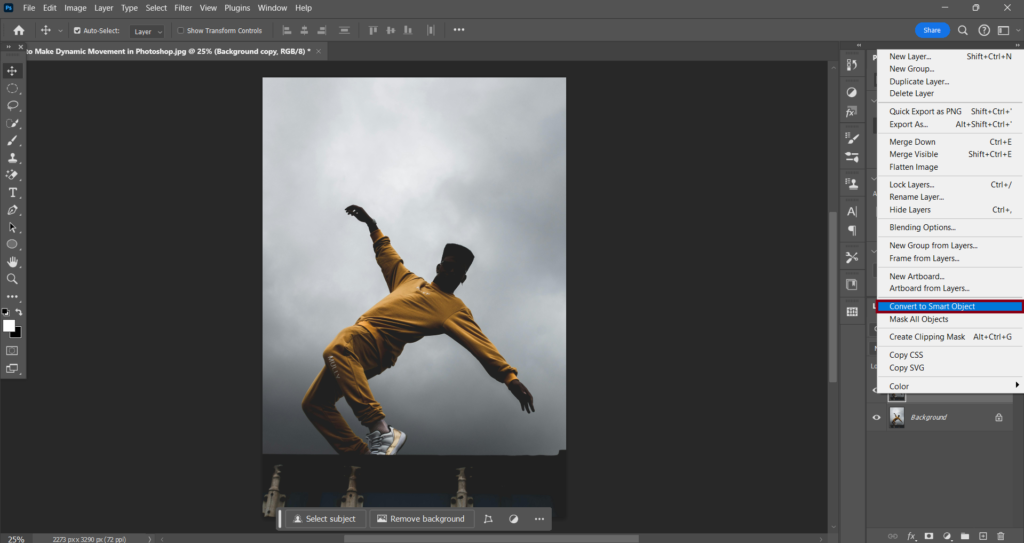
You’ll know if everything went right if you see that a little sheet icon has been added to the thumbnail of that layer.
Step 3: Apply the path blur filter
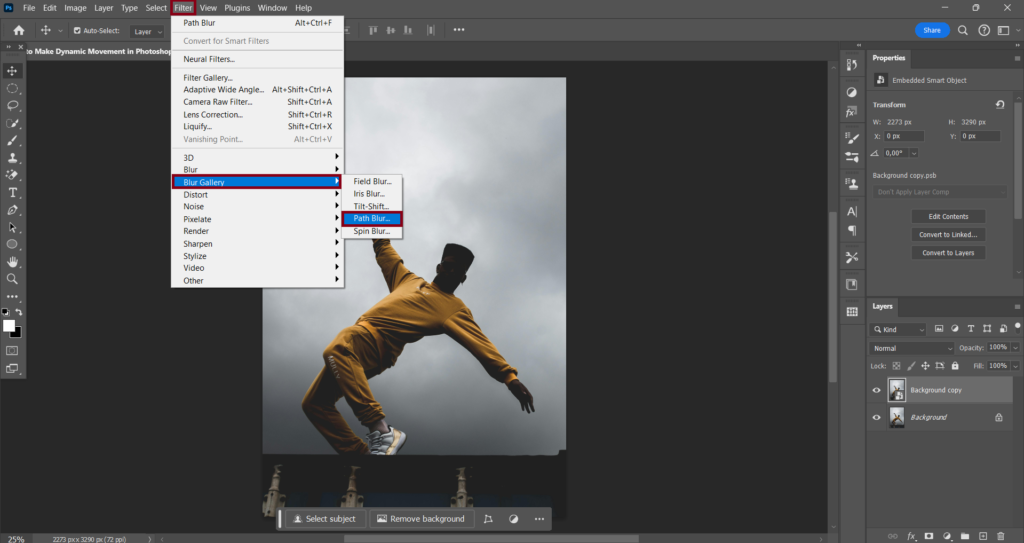
After you converted your layer to a smart object go to (Filter) select (Blur Gallery) and choose (Path Blur).
Step 4: Adjust the path blur filter
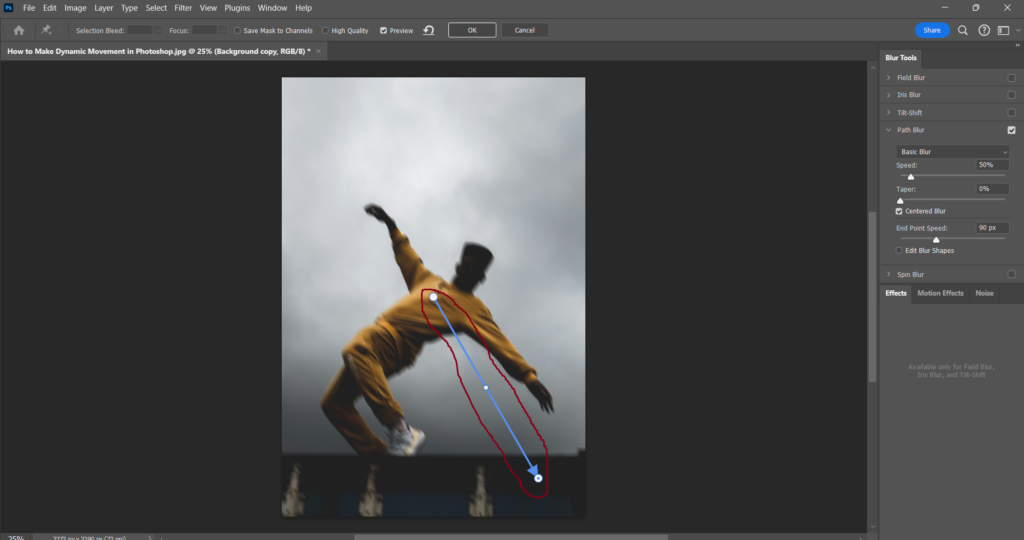
You should now see a blue arrow somewhere in your picture. That arrow is your control point. You can adjust this arrow to change various aspects of the blur effect.
For this particular picture, I won’t adjust much I will only change the length and direction of the blur by pulling the front white dot and dragging it towards the bottom.
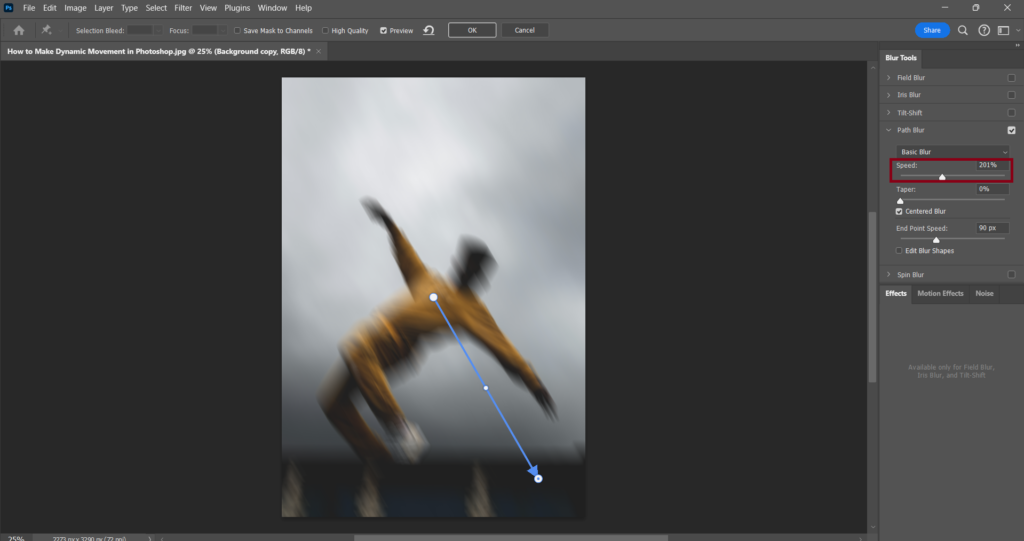
To change the intensity of the blur adjust the slider called (Speed). Changing it to 200 is good enough in my opinion. If everything looks good click on (OK).
Step 5: Remove the blur using the brush tool
You might be wondering right now why would I remove it all if I just added it? Trust me it will all make sense later into this tutorial. For now, just follow the instructions.
Click on the white layer mask in select the (Brush tool) (B) and make sure the foreground color is set to black.
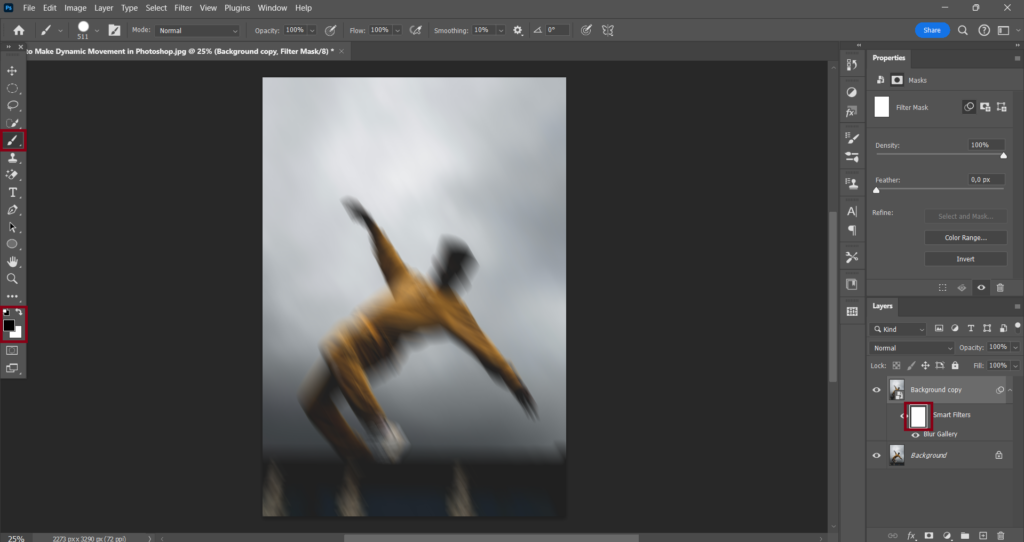
After you have done all of that paint over the image and make sure there is not a single blur spot left.
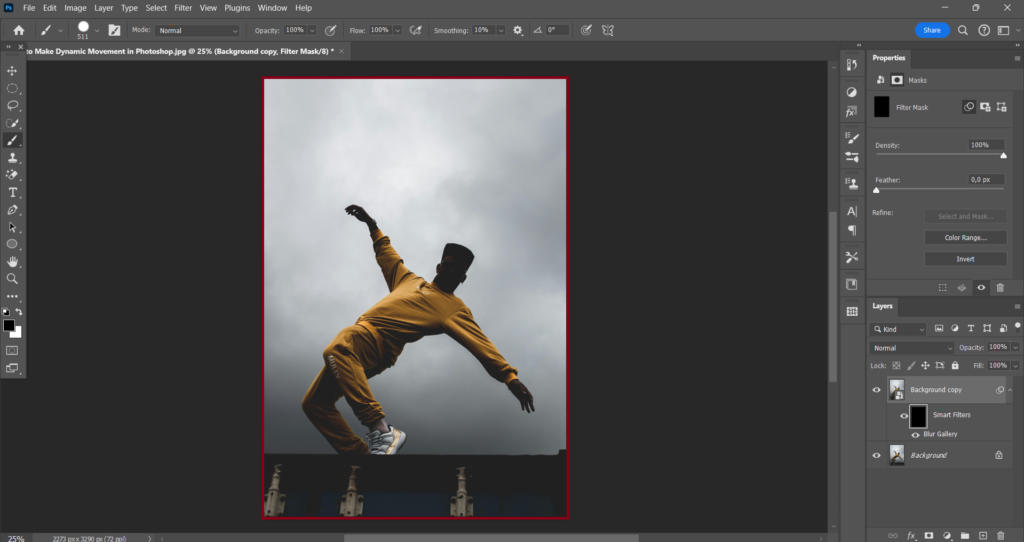
Step 6: Create the dynamic movement effect
After you have removed the blur effect from your image it is now time to create that dynamic movement effect.
Begin with setting the foreground color back to white. After you do that please select a soft brush because now you need to add that blurry effect back to the desired parts of the image.
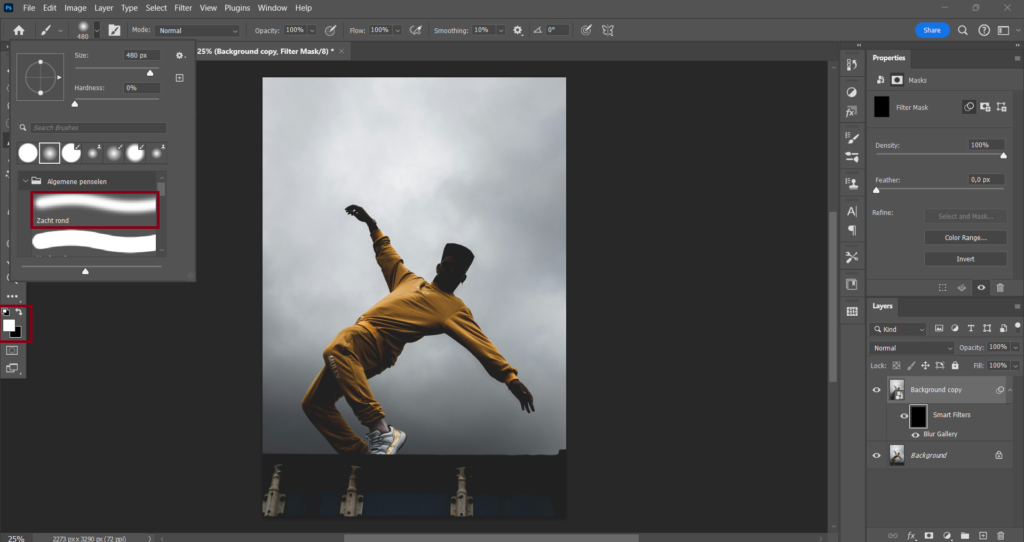
It will not look good if you use a hard brush because it will not nicely blend in with the sharp parts of the image so please again just use a soft brush.
One last thing before you start creating this effect I highly suggest instead of painting you just tap on the image while the brush is selected. This allows you to have more control over the effect.
