In today’s tutorial, you will learn how to blur videos the way you want them to be blurred. What I mean by that is when you ask the question ”how to blur a video” it’s important to note that this can usually mean 2 things.
Blurring the entire video or only blurring a specific part of the video. In this tutorial, I will teach you how to do both using Capcut.
Capcut is a powerful free video editing software that can help you enhance your videos for various social media platforms like TikTok, Instagram, Youtube, or whatever it may be.
And most important of all the reason why you’re here in the first place it can easily blur your videos the way you want them to be blurred. So let’s jump right into this and I will guide you to your end goal.
How to blur an entire video in Capcut
To get started open up the Capcut app and import the video you want to have blurred. After you do that click on (Effects) and select (Video effects). Now all kinds of video effects will appear to you.
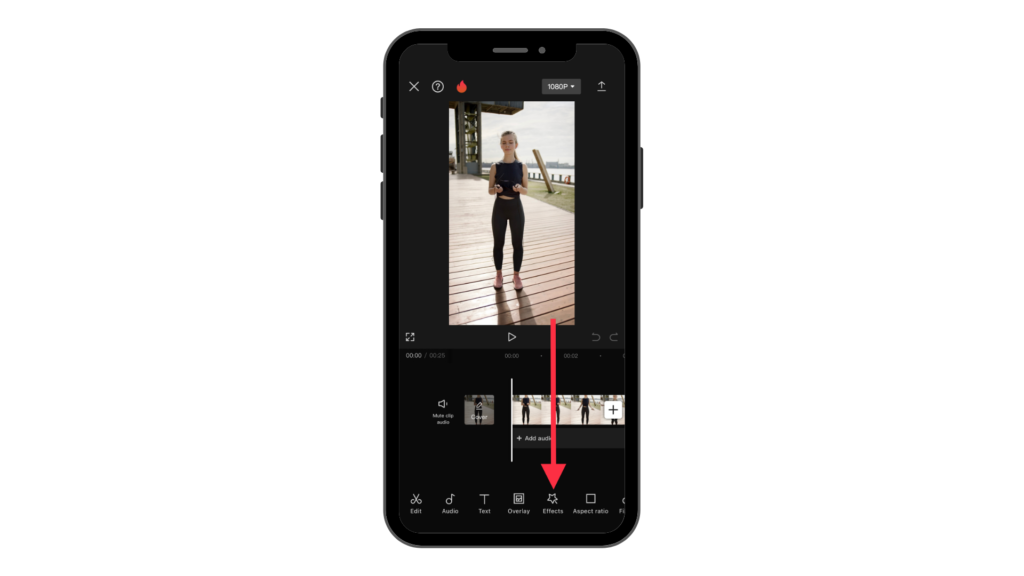
Go to the (Lens) section and apply the blur effect to your video.
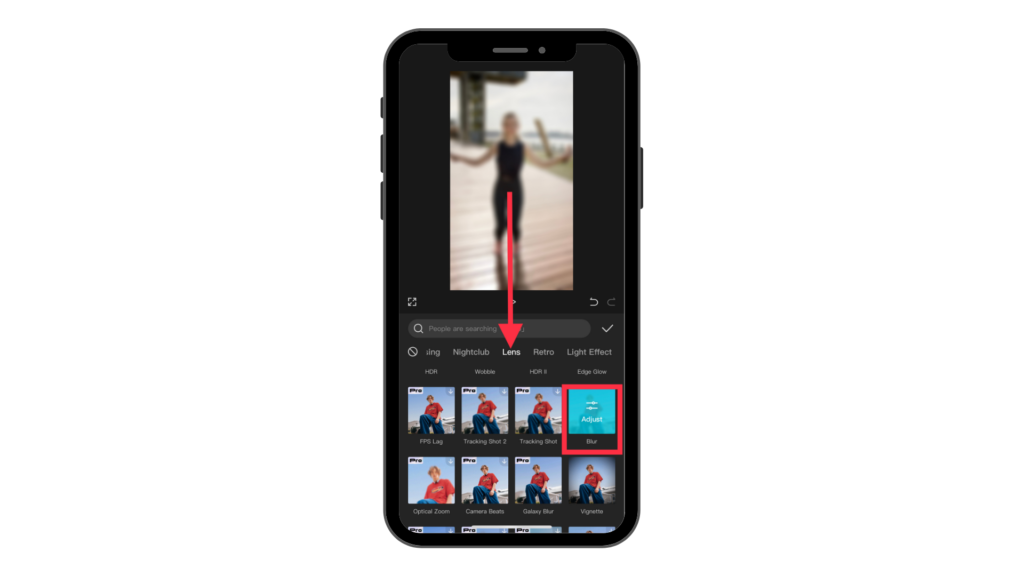
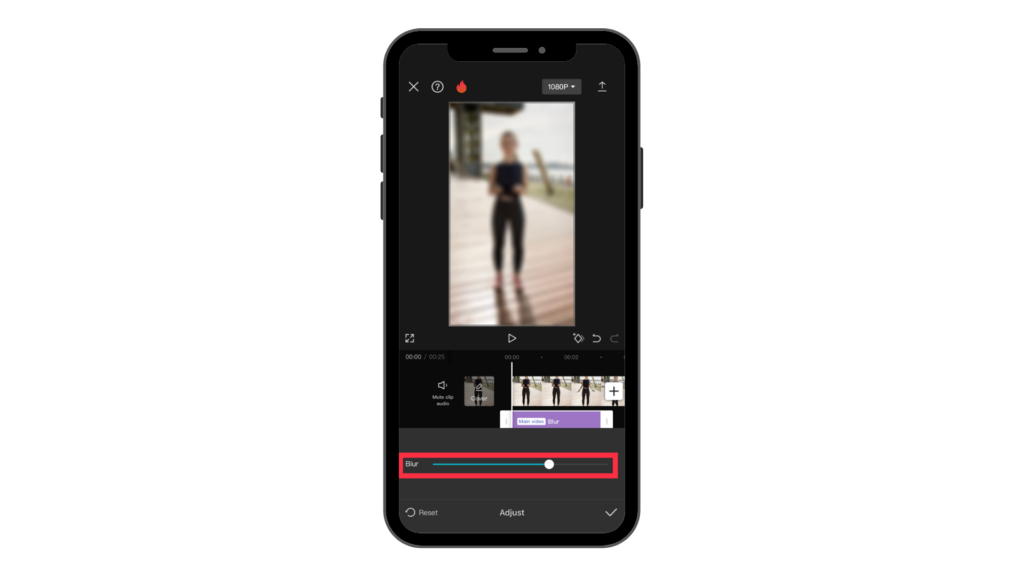
If you’re not pleased with the intensity of the blur click on (Effects) again select the blur effect in the timeline and click on (Adjust) in the toolbar. You can move the slider to adjust the blur intensity.
How to blur a specific subject in Capcut
Step 1: Blur the whole video
Firstly start with applying the blur effect onto the whole video. If you don’t know where the blur effect in Capcut is scroll up.
After you do that select the blur effect and drag it across the part of the video that you want to blur. My person is jumping the whole time so I will drag it across the whole video clip.
Step 2: Duplicate the video
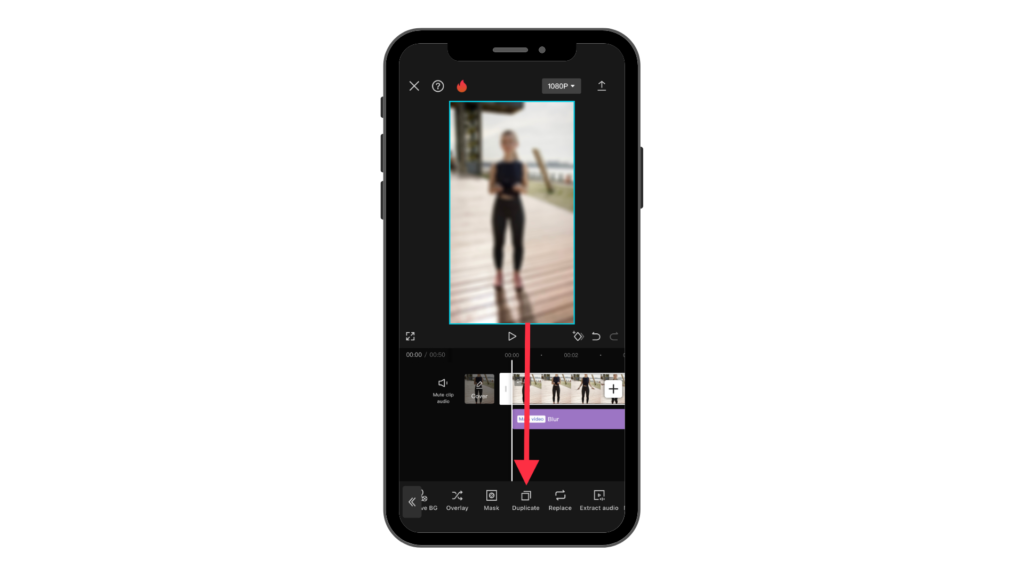
Select your video and find the option that says (Duplicate). Capcut will now make a copy of that video but without the blur effect.
Step 3: Make an overlay
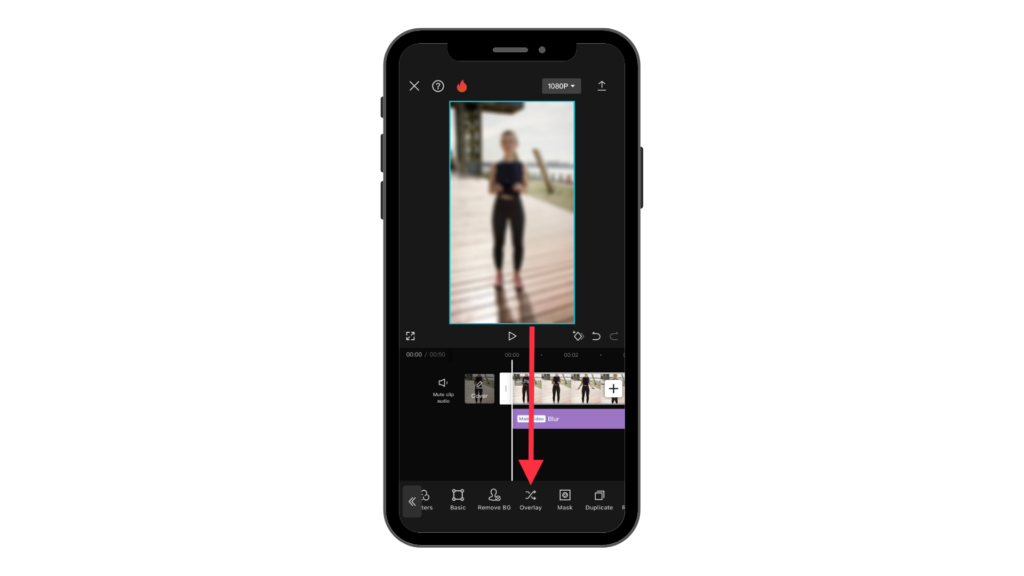
Select the main video once again and look for the option that says (Overlay) and tab on it.
Step 4: Pick a mask that suits the best with your subject
Select the second video and look through the toolbar for the option that says (Mask) and tab on it.
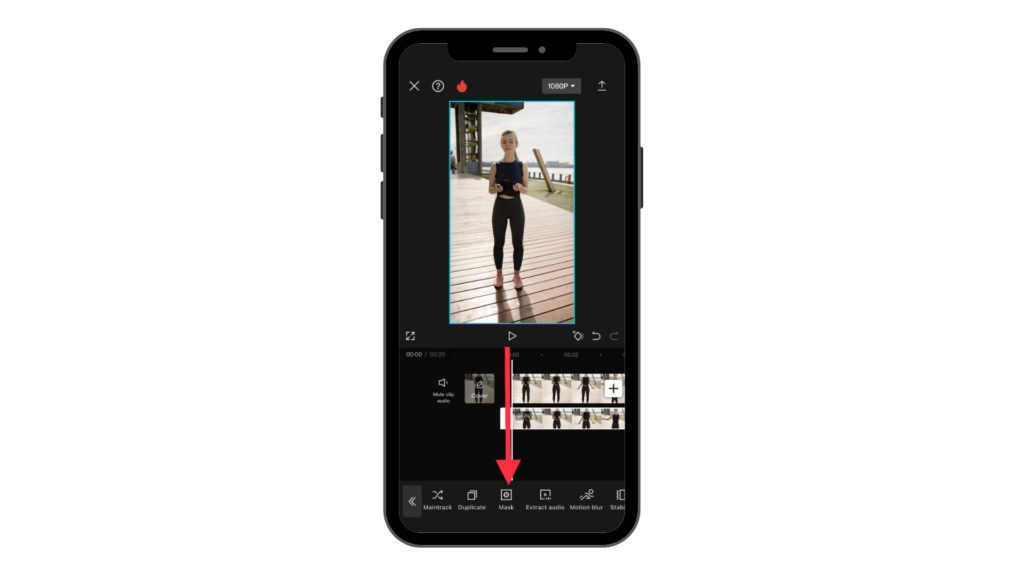
You should now see all kinds of shapes that you can use to blur your subject. For blurring faces, the (Circle) would probably be your best bet.
But if you need to blur something else other than a face I suggest you pick a shape that suits the best with your subject.
Step 5: Blur the subject using the mask
Your screen is probably now still blurred and the only clear part of the video can only be seen through the mask. To fix this click on the little (Invert) button in the bottom left corner of your screen.
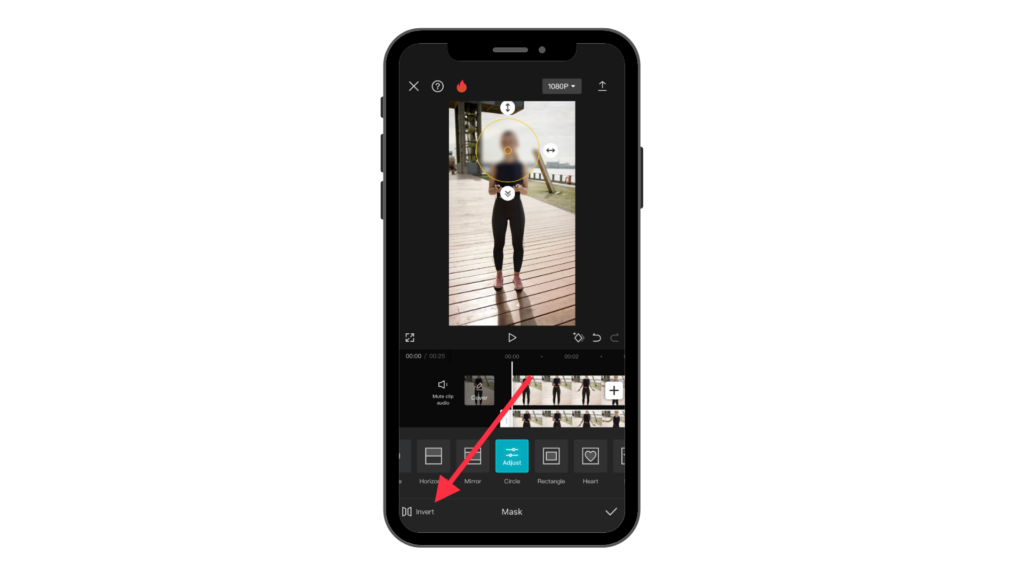
You can now start blurring your subject by just placing the mask on it but before you do that I suggest you change the size of the mask so that it matches perfectly with your subject.
Step 6: Use the keyframes to keep your subject blurred throughout the whole video
If your subject keeps moving throughout the video like mine you will have to use keyframes to fix that. Start with adding the first keyframe at the beginning.
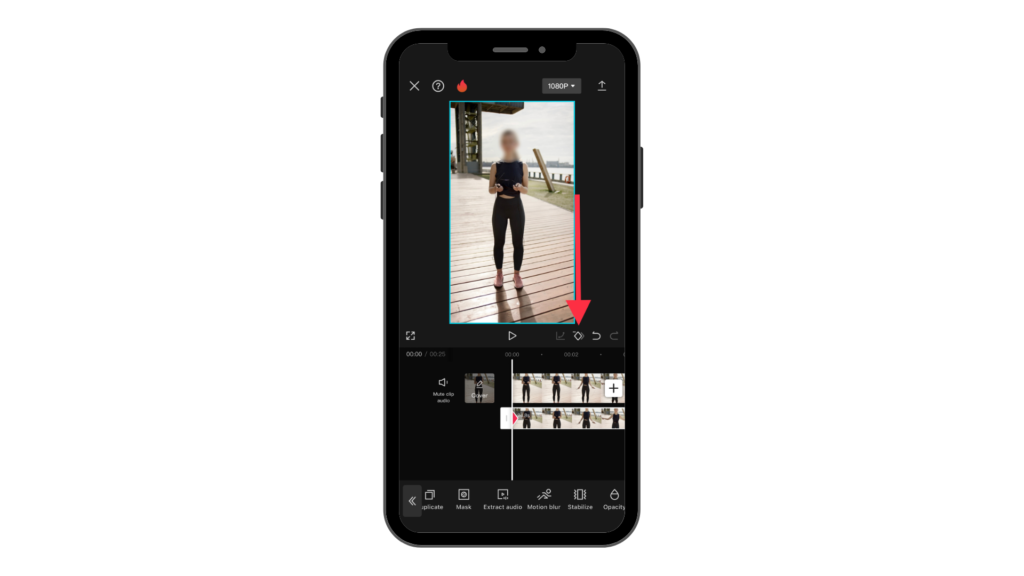
Now click on (Mask) again scroll to the next part of the video where your subject is visible again and place the mask on your subject.
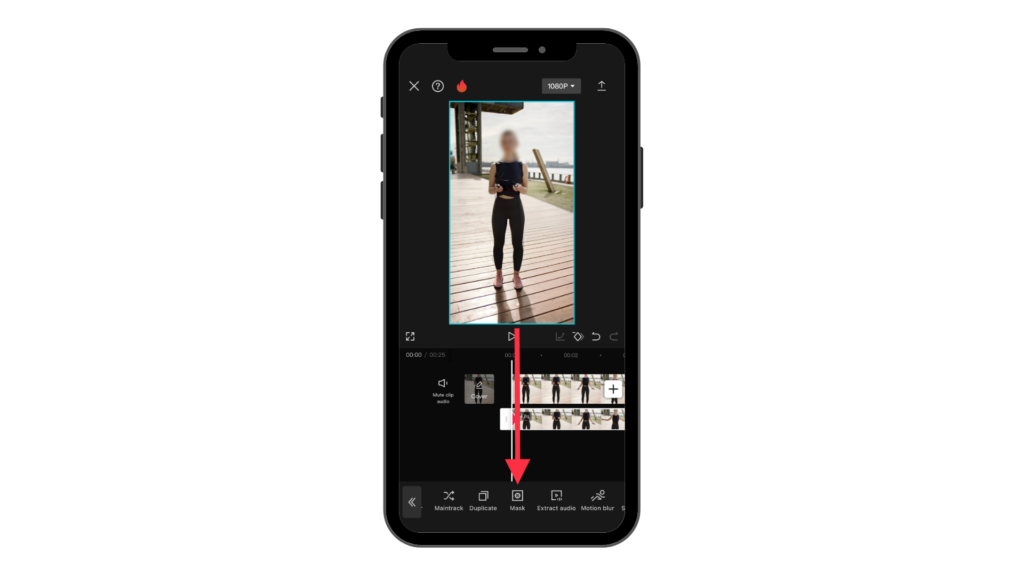
Click on the checkmark and a new keyframe will be added.
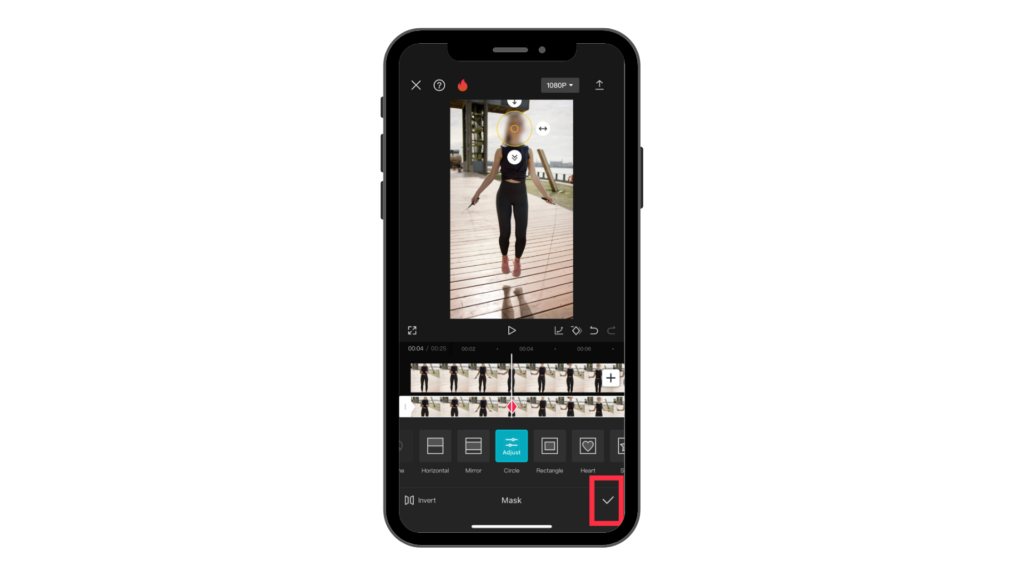
Repeat this process till the subject is blurred throughout the whole video.
Final thoughts
First of all, I hope you now know how to blur a face, a license plate, a whole video, or whatever you blurred today using the Capcut app. Speaking about Capcut this free video editor makes it so easy to blur a video for people who have never even touched an online video editing software.
I mean for this particular task you really don’t have to have the craziest editing skills. You can just watch a video or read an article and do it yourself. I mean because of me you now know two ways to blur a video in Capcut.
If you want me to write another blog post about how to blur the background of a video using Capcut again. Or you may like to see something else from me about Capcut feel free to contact me and we will figure something out.


