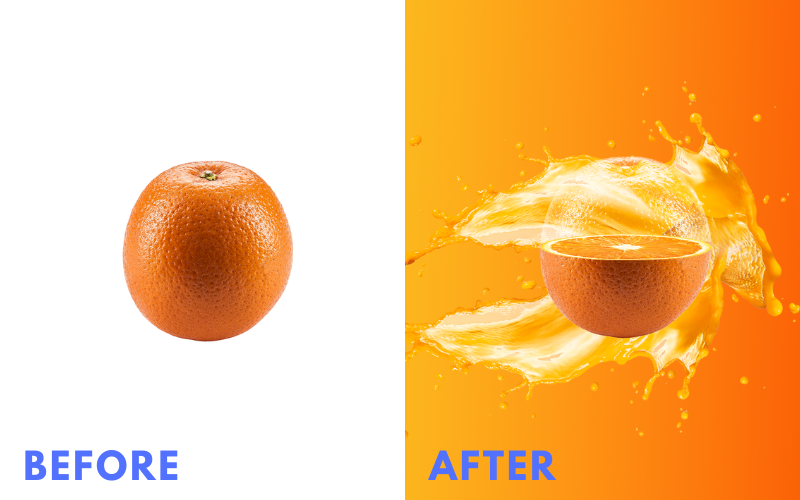
Looking to make your photos more awesome? learn how to create the Orange Transparent Manipulation Effect in Photoshop!
Creating this effect in Photoshop and showing it to the world will make you stand out from your competition and will attract a lot of attention.
I know that sounds pretty overwhelmingly good but it’s the truth. I mean, first of all, it can already please an eye by just looking at it because of its unique look.
Second of all, very few people know how to create or even imagine this kind of effect so that’s exactly why you should start learning how to do this.
In this tutorial, I will walk you through how I created this amazing Orange Transparent Manipulation Effect in Photoshop using 10 easy-to-follow steps.
How to create the orange transparent look in Photoshop
Step 1: Have the right images
Before we can get started there are 3 images you need to have to create this Orange Transparent Manipulation.
- Orange
- Orange slice
- Orange splash/water splash
For personal reasons, I can’t share what orange splash I’m using but using a water splash can also look very cool. But if you still want that orange splash in your photo there are 2 things you can do.
Changing the color of the water to an orange juice color. In my personal opinion that looks a bit unrealistic but still, if it looks good to you do that. Or find your orange splash photo on the internet.
Step 2: Import the orange to Photoshop and remove the background
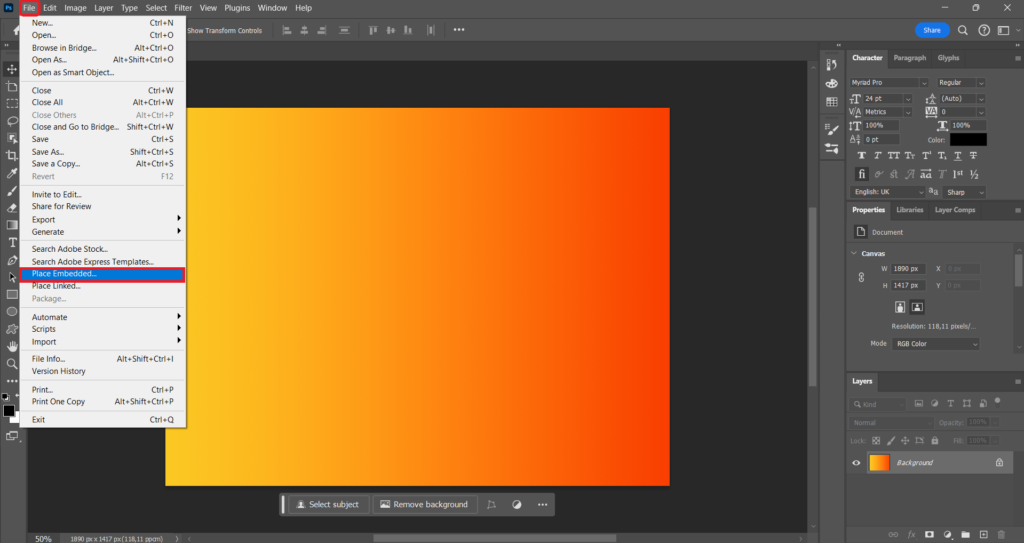
Firstly open up Photoshop and head over to your document. As you can see I already made a background for myself using the (Gradient tool). But you can use any background you want.
Go to (File) click on (Place Embedded) import the orange to Photoshop and click on the checkmark icon in the top menu.
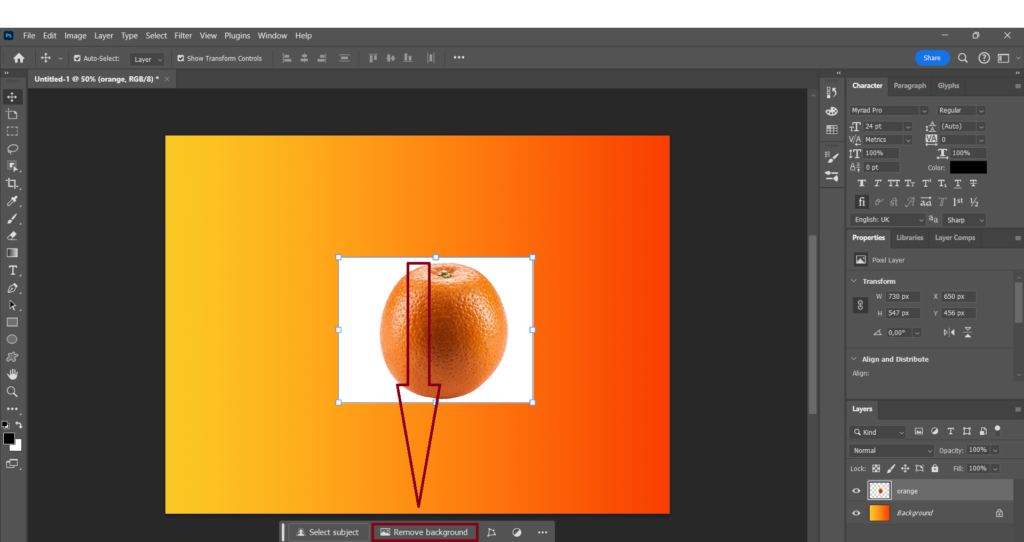
Now right-click on the orange in the layers section and select (Convert to Layers).
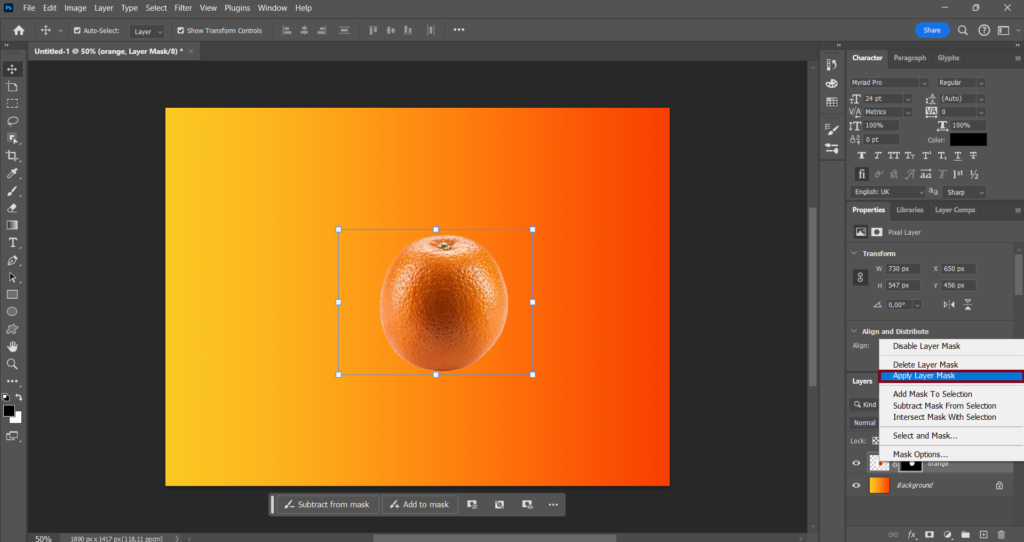
If your orange has a background click on (Remove background) in the Contextual Task Bar to remove that background.
If you don’t see the Contextual Task Bar go to (Window) and click on (Contextual Task Bar).
One last thing before we head over to the next step if you removed the background of the orange right-click on the layer mask of the orange and select (Apply Layer Mask).
Step 3: Duplicate the layer of the orange and desaturate it
Right-click on the orange in the layers panel and select (Duplicate Layer).
Now make sure the duplicated orange layer is selected and go to (Image) Click on (Adjustments) and select (Desaturate).

For now, also hide the original orange layer by clicking on the eye next to it.
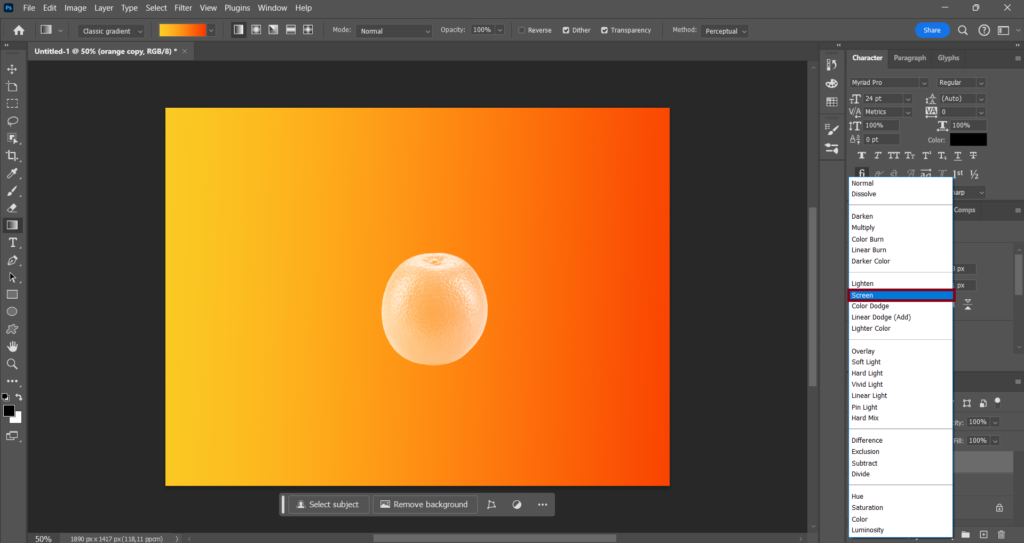
Step 4: Change blend mode to screen and adjust the levels accordingly
Make sure the duplicated layer of the orange is selected and change the blending mode from (Normal) to (Screen).
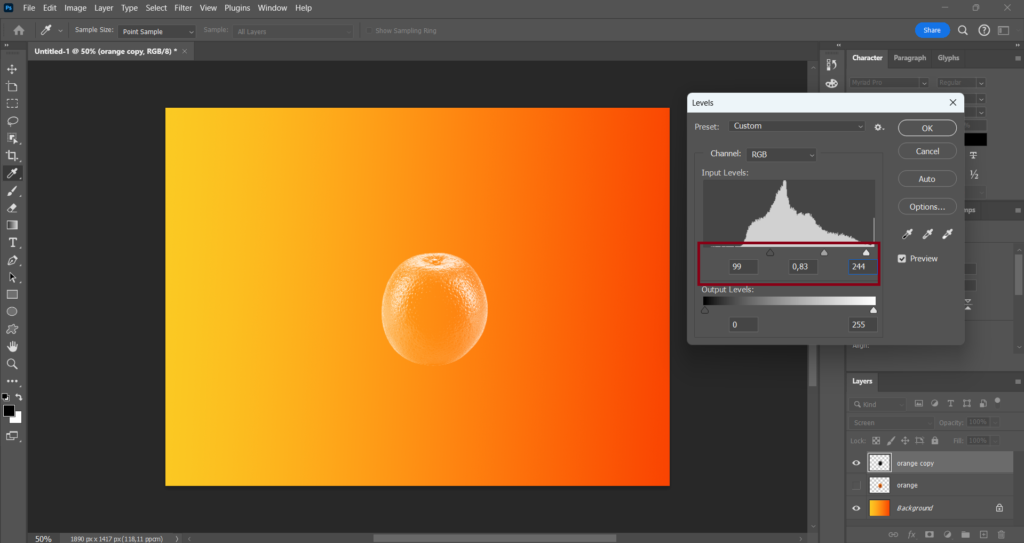
Now press (CTRL + L) or (Command + L) to open the levels panel. For the icon on the left side that looks a bit like a triangle, I would change it to (99) the one in the middle to (0,83), and the one to the right (244).
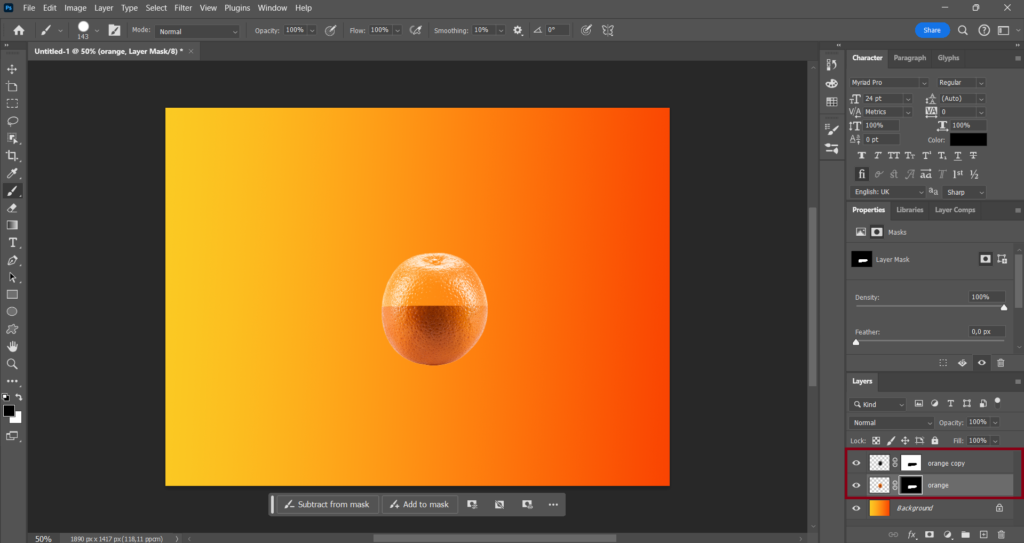
Step 5: Remove half of the orange using the brush tool
Make sure the duplicated layer of the orange is selected and add a layer mask.
Select the (Brush tool) and remove the bottom of the orange. Also before you do that make sure the foreground color is set to black.
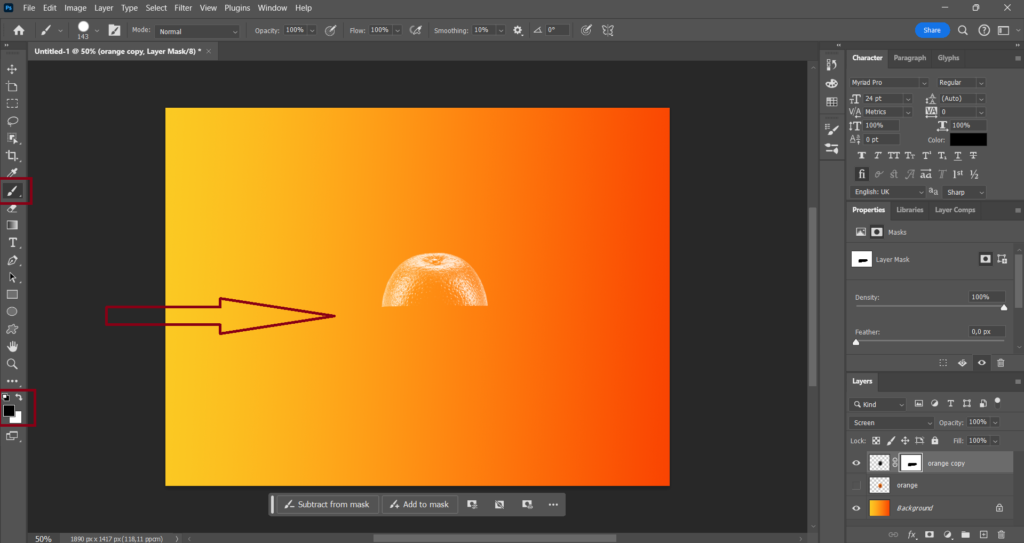
Now make the original orange layer visible again and drag the layer mask while holding the (ALT) or (Option) key onto the original orange layer and invert that layer mask next to the original orange layer by pressing (CTRL + I) or (Command + I).
Step 6: Import the orange slice to Photoshop and remove the background
Go to (File) click on (Place Embedded) import the orange slice to Photoshop and click on the checkmark icon in the top menu.
Now right-click on the orange slice in the layers section and select (Convert to Layers).
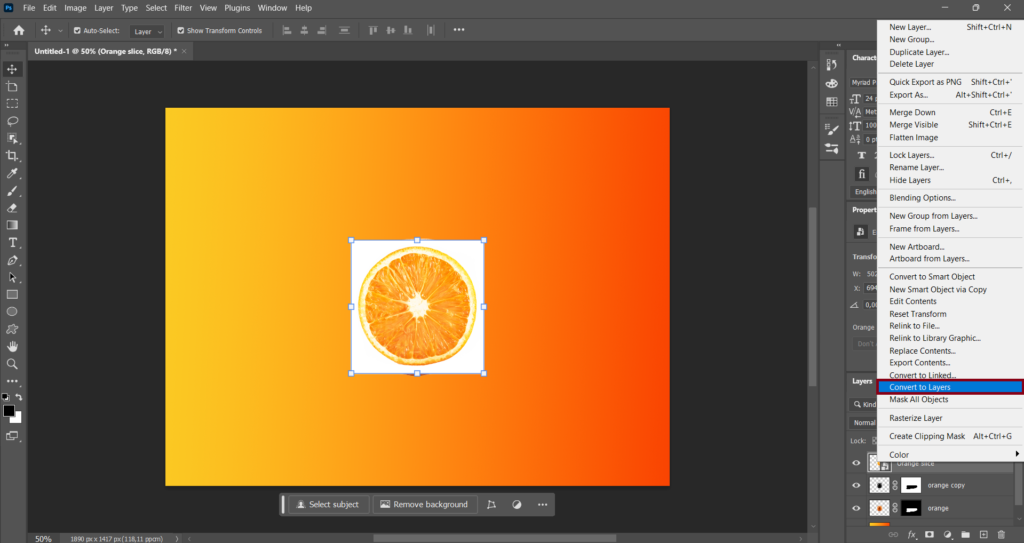
If your orange slice has a background click on (Remove background) in the Contextual Task Bar to remove that background.
Also if you removed the background of the orange slice right-click on the layer mask of the orange slice and select (Apply Layer Mask).
Step 7: Place the slice in the middle of the orange
Adjust the size of the slice accordingly. It doesn’t really matter what size because you can change that always later.
Press (CTRL + T) or (Command + T) to activate the transform controls. After you do that right click on the slice and select (Distort).
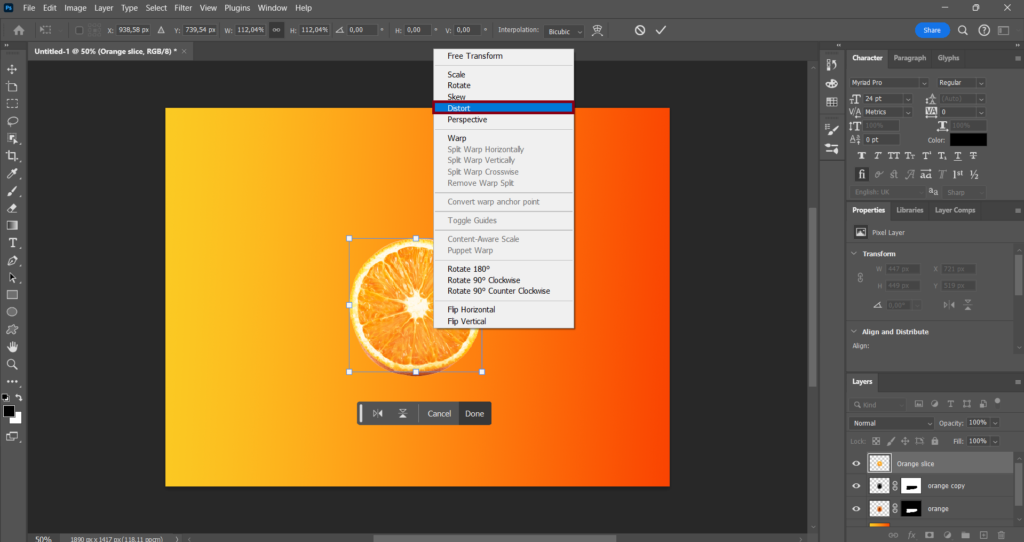
Now just play around with the handles but just make sure the slice is positioned flat in the middle of the orange like you see in my image here below. I also suggest you zoom in for better precision.
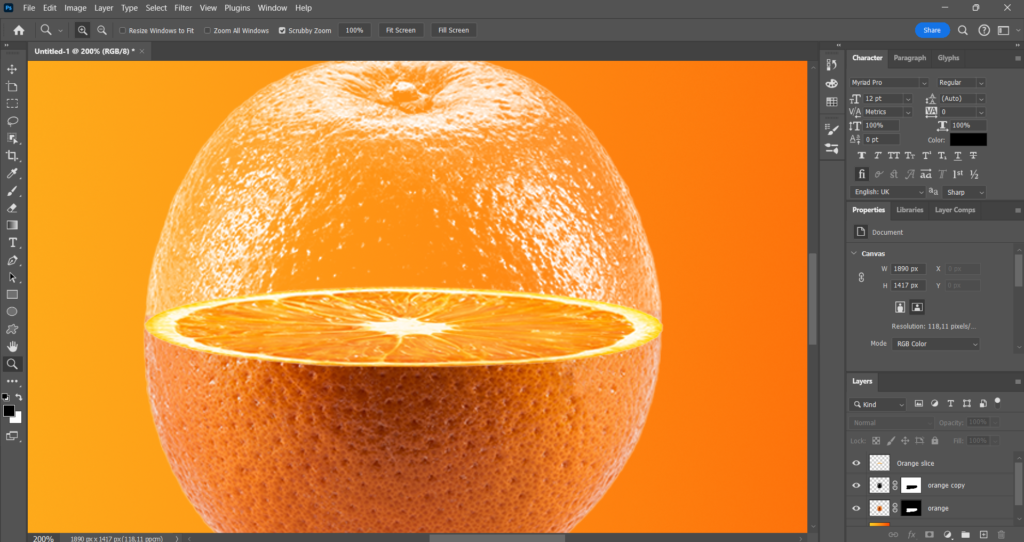
Step 8: Fine-tune the transparent area of the orange
Make sure the layer mask of the copied orange is selected. After you do that select the (Brush tool) And make sure the foreground color is set to white.
Now paint over the transparent area of the orange to grab those last little bits. There will probably not change much but that’s okay.
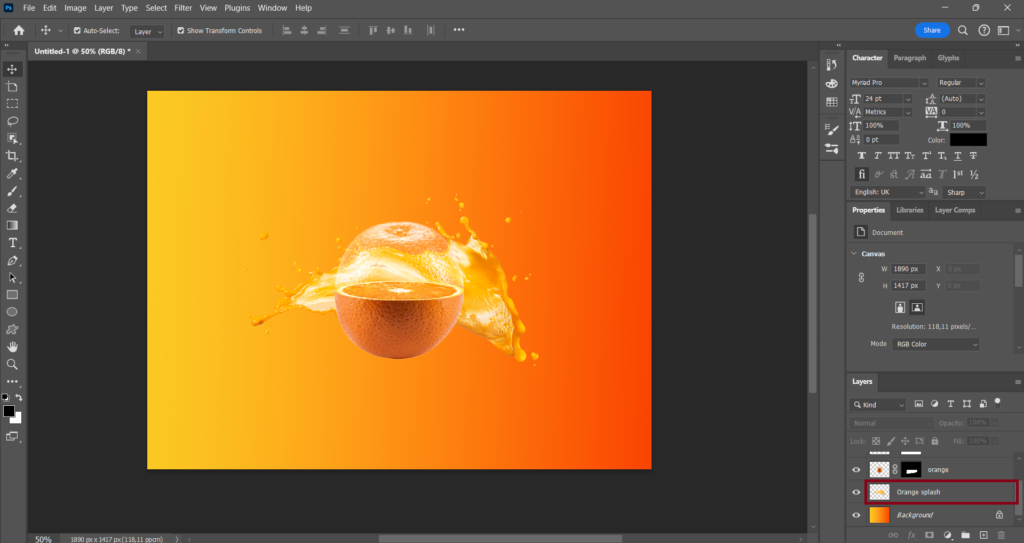
Step 9: Import the orange/water splash to Photoshop and remove the background
Go to (File) click on (Place Embedded) import the orange/water splash to Photoshop and click on the checkmark icon in the top menu.
Now right-click on the orange/water splash in the layers section and select (Convert to Layers).
If the orange/water splash has a background click on (Remove background) in the Contextual Task Bar to remove that background.
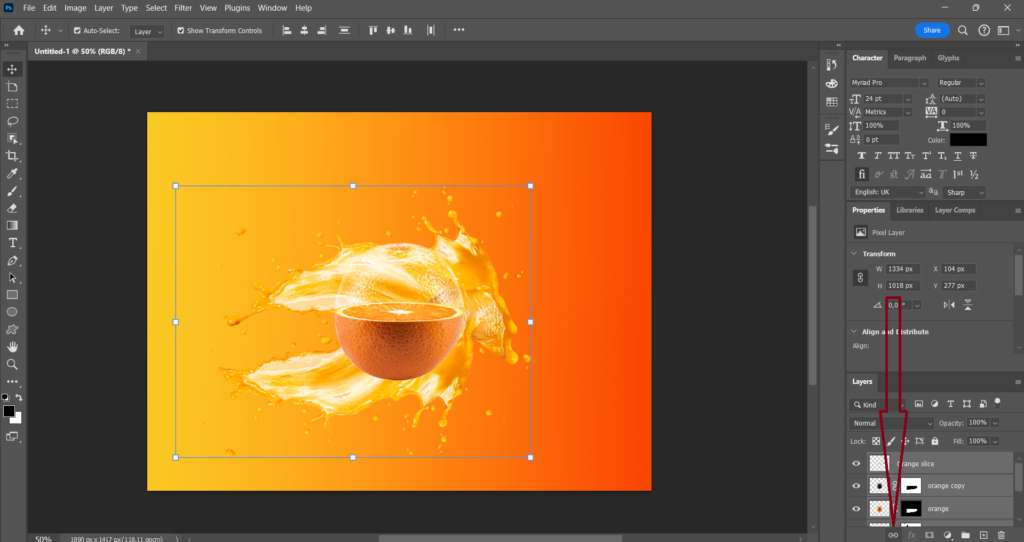
Step 10: The final step!
Place the layer of the orange/water splash behind the orange layers so that the orange/water splash will not be in front of the orange.
After you do that use to (Move tool) and the Transform controls to play around a bit with the size, position, and shape, of the orange/water splash.
What you also can do is duplicate your orange/water splash for a more wilder look.

Now the last thing I suggest you do is link every layer together that has something to do with the orange.
The reason for that is that you can then adjust the size, position, shape, and other things of the whole orange without having to adjust every other layer that is connected to the orange. But if you don’t want to do this that’s fine.
Final thoughts
Here you are at the end of this tutorial. First of all, I want to say that this was definitely one of my most favorite tutorials I ever wrote. I was very fascinated by how easy Photoshop it makes for us to create this amazing Orange Transparent Manipulation Effect in a very short amount of time.
I also really hope you now know how to create this effect in Photoshop the way I did it. If not and you have a question about something or noticed a mistake during this tutorial please contact me and I will try to respond as quickly as possible wish you the best;)