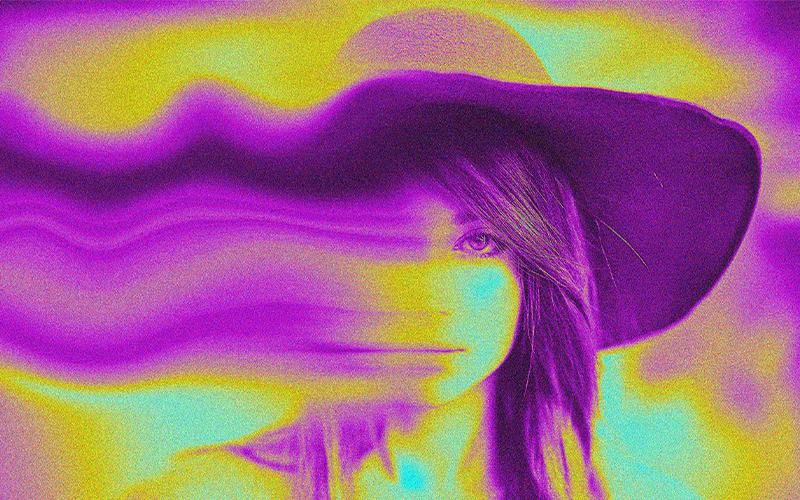
In today’s tutorial, I will reveal all my insights that I used to create an amazing stretched blur effect like the picture you see above using Photoshop’s liquify tool.
The liquify tool is a very wide tool that can be used for a lot of things including creating a stretched blur effect.
But of course, we will not only be using the liquify tool to create this stretched blur effect. I mean yes it plays a very big role in terms of creating a stretched blur effect.
But there are a lot of other things that come with it as well. Like choosing the right colors, the right blur, the right image filters, just these kinds of things.
I mean if you want you could just create the stretched blur effect and leave it like that but if you want a nice finished image like mine plus with a nice stretched blur effect in it follow the steps.
How to create a stretched blur effect using the liquify tool
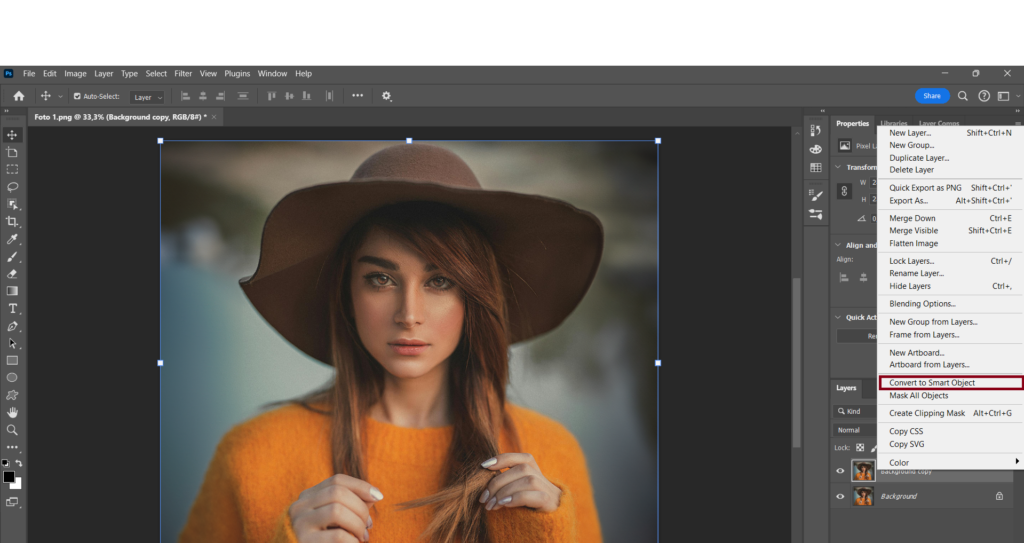
Step 1: Convert your image to a smart object
Firstly open up Photoshop and import your desired image. Now you don’t have to do this but I always like to duplicate my image in case something goes wrong or I want to see a quick before and after.
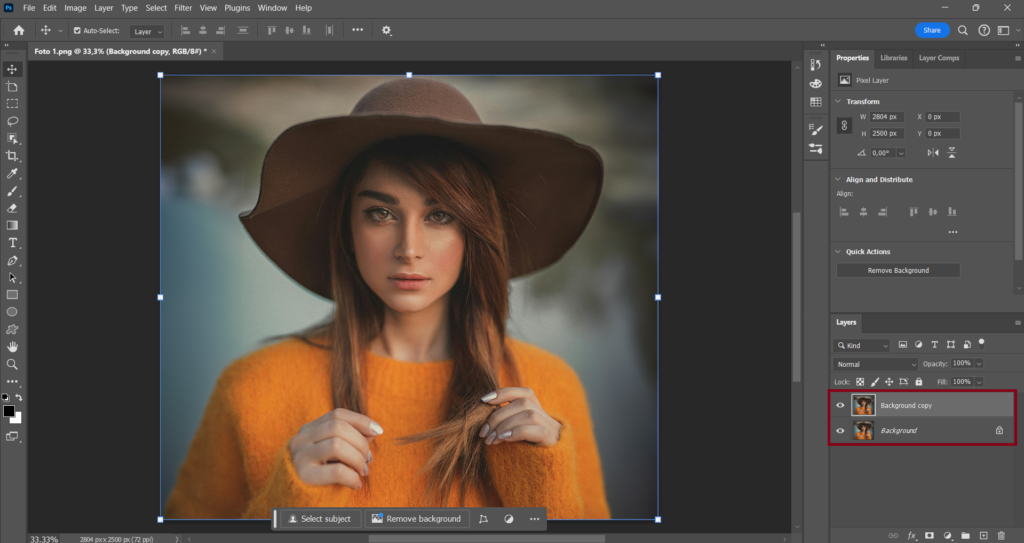
Now select your image in the layers panel right right-click on it and select (Convert to Smart Object).
Step 2: Blur the image
With the smart object layer selected go to (Filter) click on (Blur) and select (Motion Blur). Don’t click (OK) yet. First, change the (Pixels) to (700) and the (Angle) to (0).
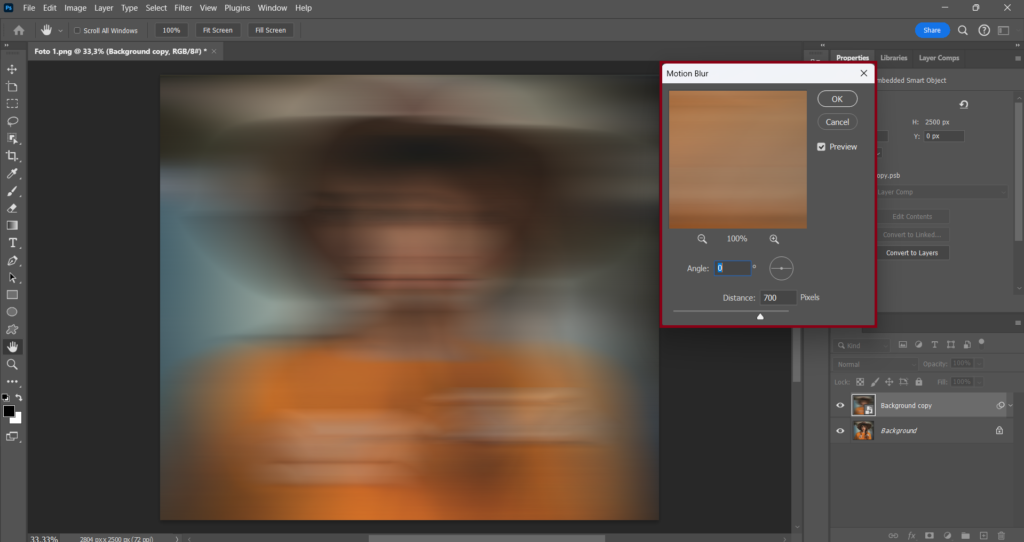
Changing the angle to 0 is a setting that everyone should use but if your person is a bit further away in the image compared to mine you should lower the pixels accordingly.
The reason for that is later in this tutorial you will have to stretch out the blur effect and if the blur is too strong it will be pretty difficult to precisely stretch and find the spot you blurred.
Step 3: Blur half of the face using the brush tool
Firstly select the white smart filter layer and hide the blur of the image by using the keyboard shortcut (CTRL + I) on Windows or (Command + I) on Mac.
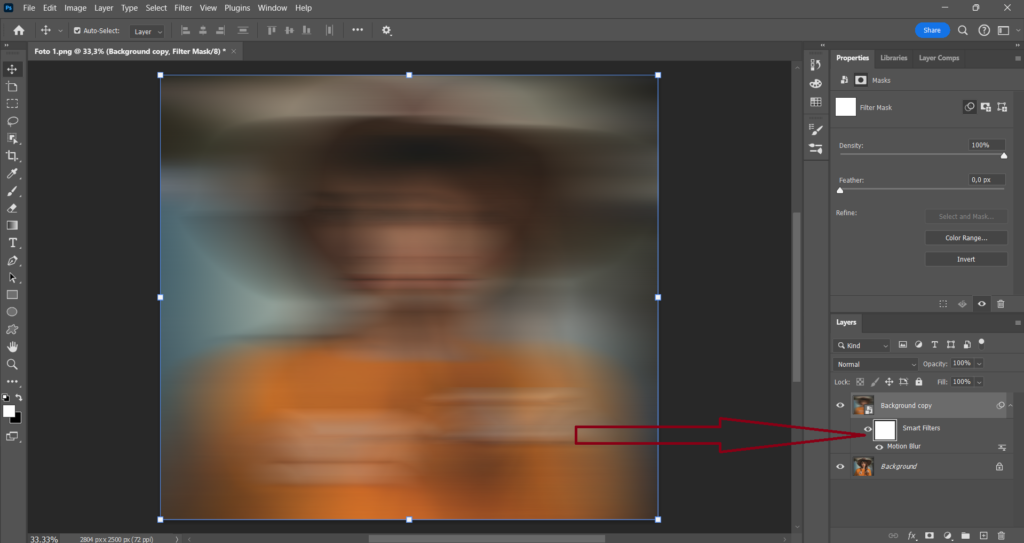
Now select the (Brush tool) make sure the foreground color is set to white and brush over your personal face to reveal the blur effect.
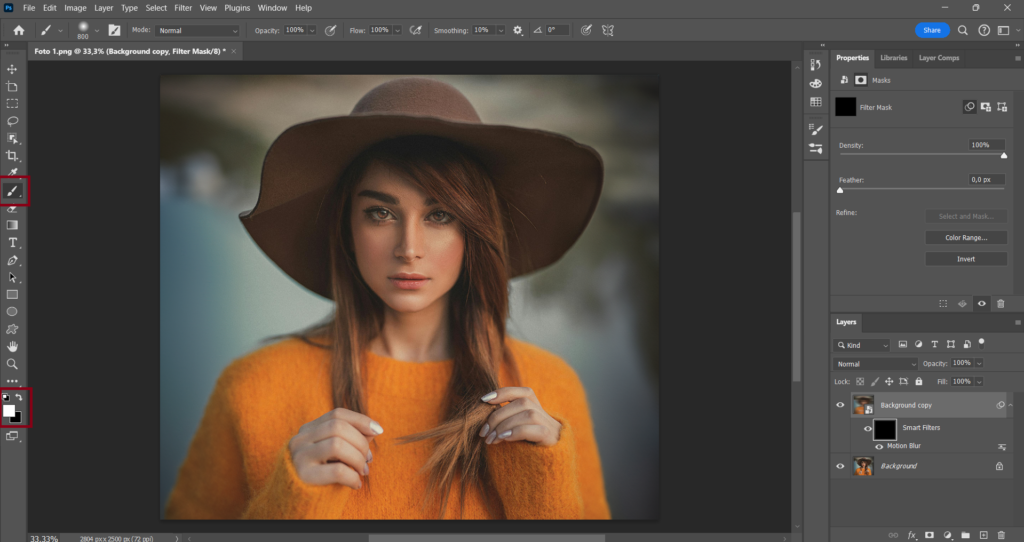
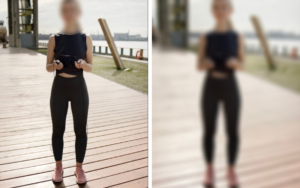
Remember only brush over half of the face so that the other side of the face is still visible. Also, drag the blur effect horizontally all the way over to the end of your image.
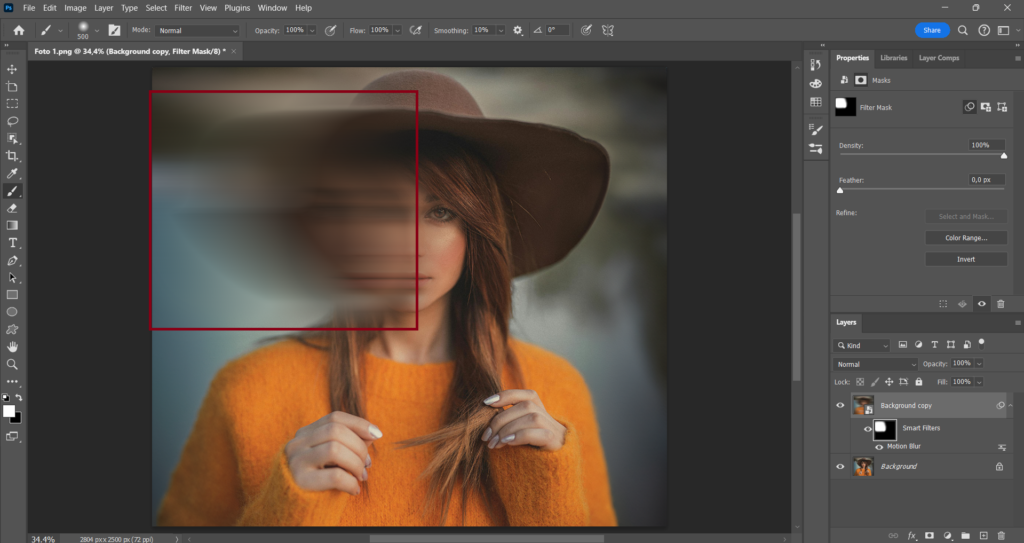
Step 4: Stretch out the blur using the liquify tool
Seatbelts on this is the most important step of this tutorial because after this step I will only talk about how to enhance the image, not the main blur effect itself.
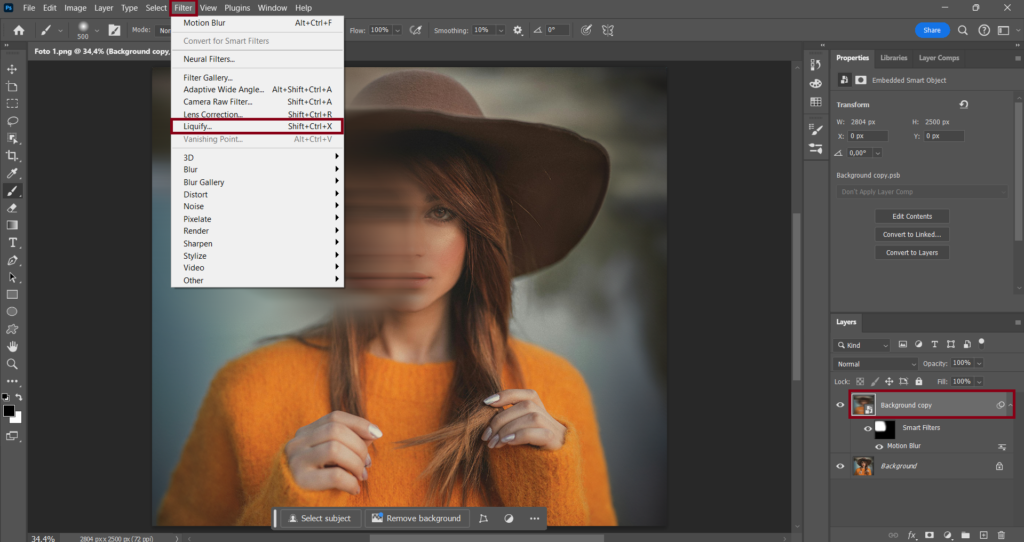
Firstly make sure the image layer is selected not the smart filter layer. Then go to (Filter) and select (Liquify).
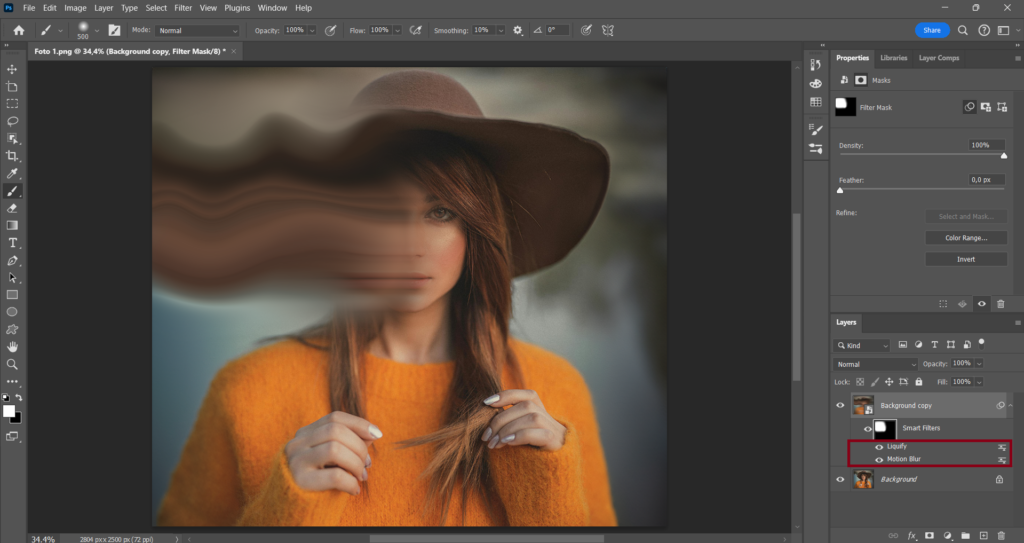
Now from here you really don’t have to do much the only you will have to do from here is stretch out the blur horizontally toward the end of your image.
I suggest you also create a bit of motion when you’re stretching out the blur instead of just straightly stretching it out. See my image below to know what I mean.

After you’re done click on (OK) to see what it looks like. If things don’t look too good you can always adjust it again by double-clicking on the liquify effect under the smart filter layer. Do the same thing if you want to adjust the motion blur.
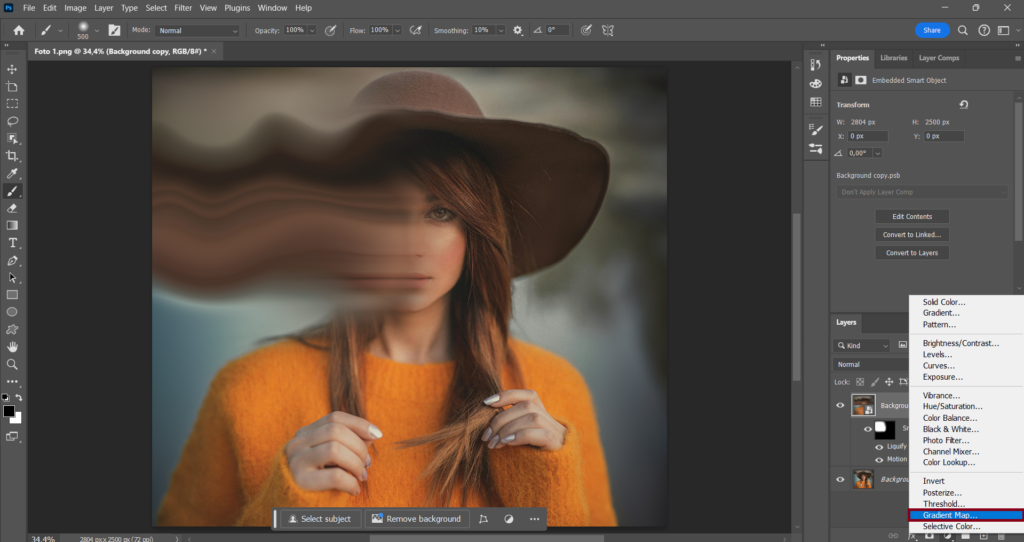
Step 5: Add colors to the image
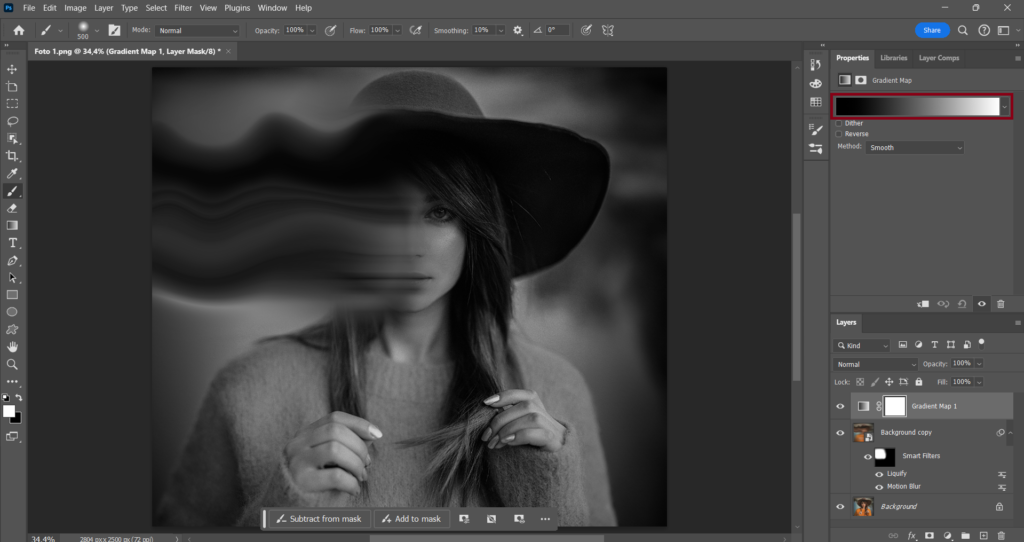
A colorful image would suit very well the blur effect so make sure the image layer is selected click on the adjustments icon under the layer panel and select (Gradient Map). The image should now look darker than it was before.
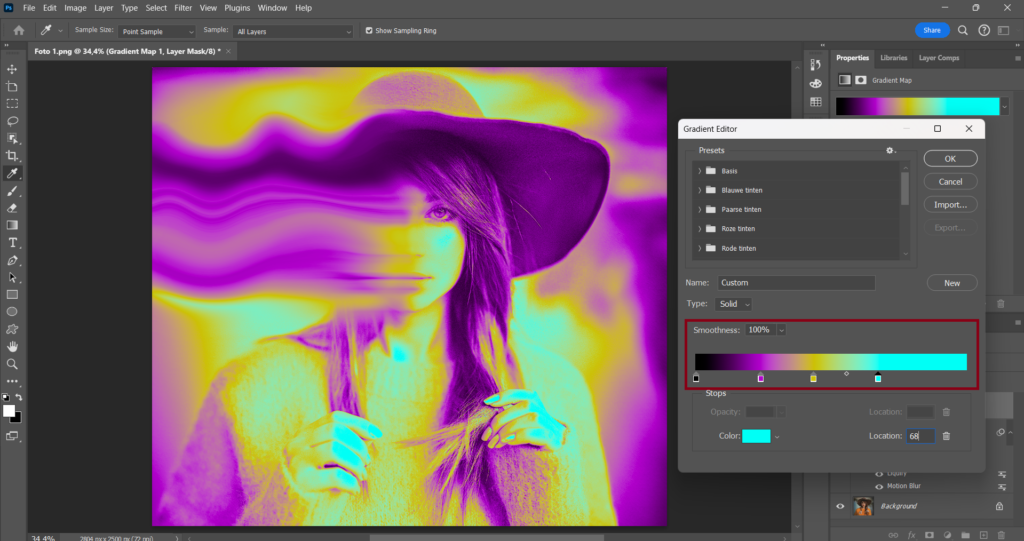
To access the gradient editor panel click on the gradient bar you see in the image below.
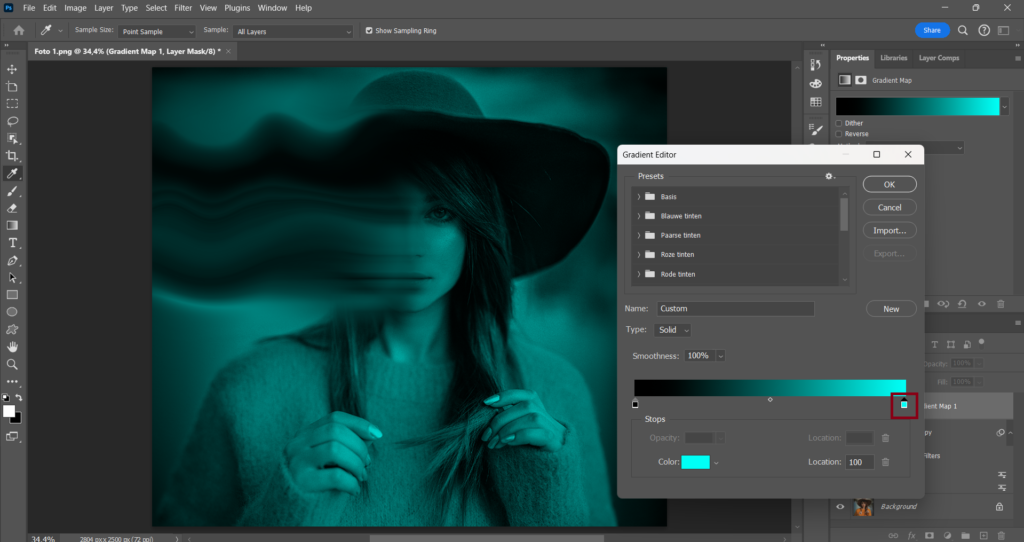
Now first click on the last color stop the one that is white and change the color to light blue (00fff6).
Now you will have to manually add 2 more color stops. You can do that by just simply clicking somewhere under the color bar and a color stop will be added. Do that 2 times to add 2 color stops.
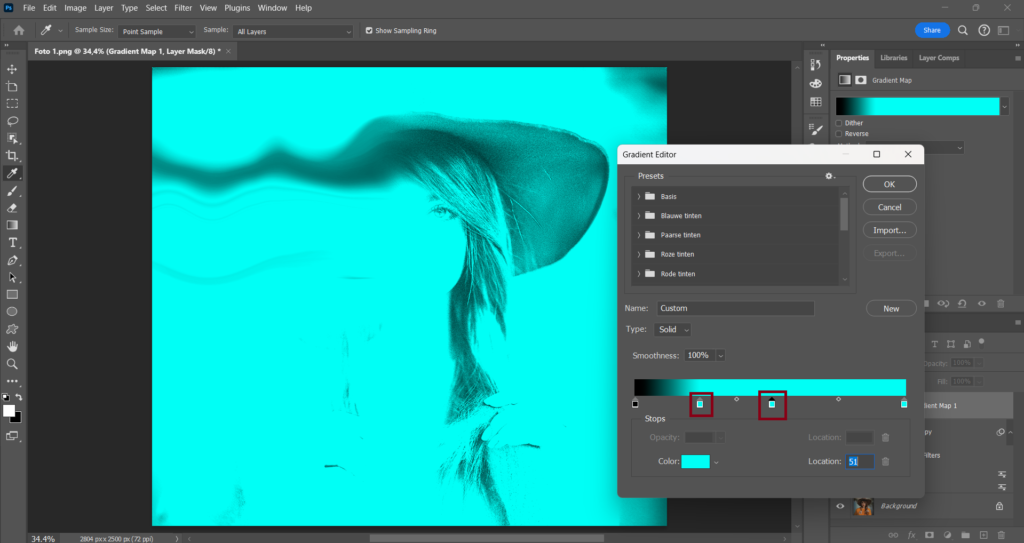
Now change one of the 2 color stops to purple (b204cc) and the other one to yellow (ccc004). Now also position the color stops accordingly.
Step 6: Add noise to the image
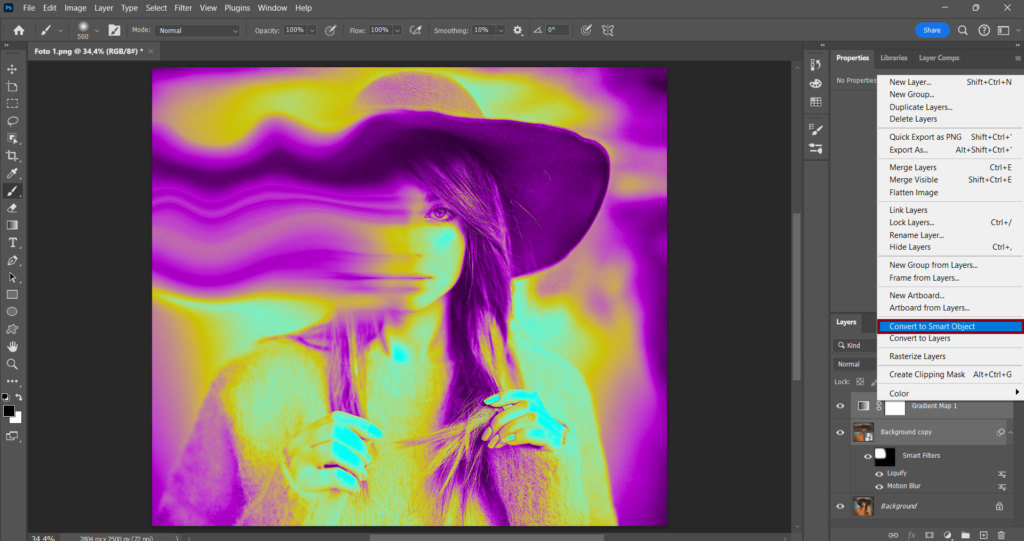
Firstly select the image and gradient map layer and convert them to a smart object layer.
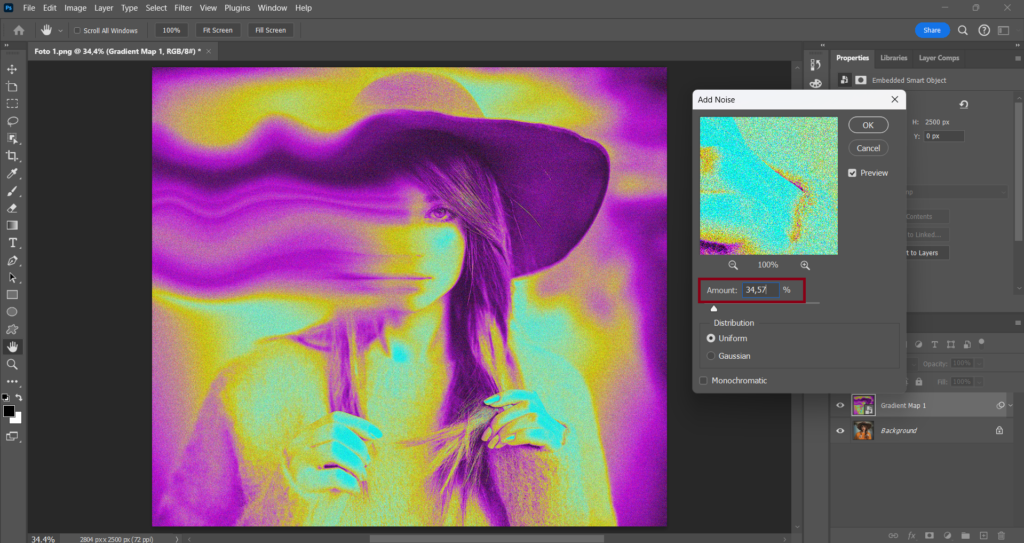
After you do that go to (Filter) click on (Noise) and select (Add Noise). For this particular image, I will go with (34,57) and just leave it like that.
Final Thoughts
First of all, I really enjoyed creating this article because the transformation from the original image to this is just really amazing. Also please let me know if you liked this tutorial because then I can create a new similar one.
If you were following me in Photoshop throughout this article I really hope you now also know how to do this. If not and you have a question about something or noticed a mistake during this article please contact me and I will try to respond as quickly as possible wish you the best;)