In the world we live in today everyone wants a nice pearly white smile in the wedding photo, social media profile, company photo, whatever photo it may be. But unfortunately, we can’t snap our fingers and just let it happen you will have to brush your teeth a lot and eat and drink healthy or buy facings.
But what if you don’t want to do all of that just for one photo. You will have to learn how to whiten teeth using a well-crafted editing program that can make it look realistic and good.
So the app that I will use today to teach you how to whiten teeth is called Adobe Lightroom Classic.
If you haven’t used Lightroom before you are probably thinking aren’t editing programs difficult to use? Well yea in some cases but not this one. Lightroom makes it very easy for us to whiten the teeth of a person or even an animal because they have a built-in teeth whitening effect. Or what others call a preset.
Lightroom presets act a bit like Snapchat filters but way better. So let’s jump right into this tutorial or guide whatever you want to call it and take advantage of it.
Step-by-step guide: How to whiten teeth in Lightroom Classic
Step 1: Mask the teeth
In Lightroom, there are 2 ways you can mask the teeth of a person. You can use the adjustment brush tool to select the teeth or use the AI feature. I like the AI feature the most because with the brush, I have to adjust the brush settings and paint over the teeth.
But when I’m using the AI feature I can sit back and tell Lightroom that I want the teeth to be masked.
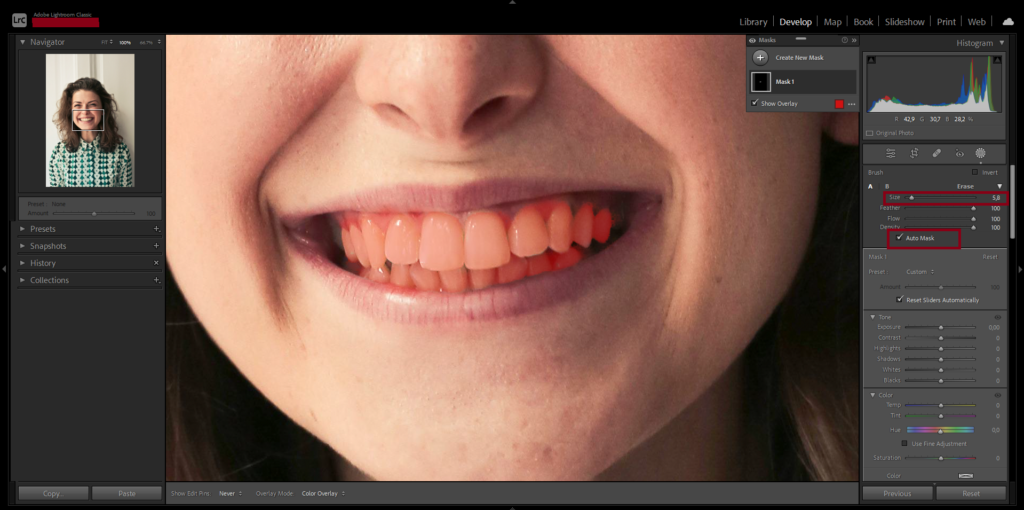
Using the brush tool
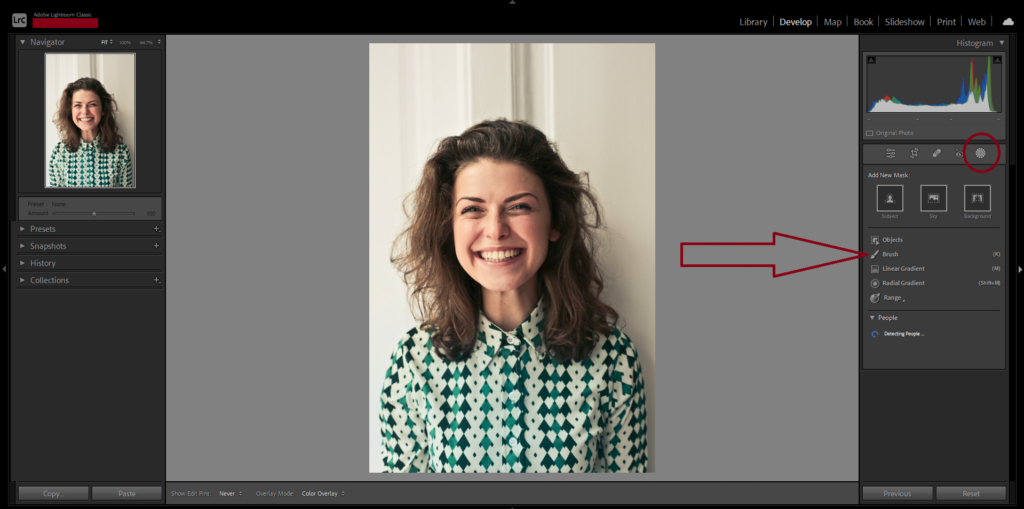
To get started open up Lightroom import the image you want to use and head over to the (Develop) module. Now click on the masking icon under the (Histogram) panel or use the keyboard shortcut (SHIFT + W). After you do that click on the word (Brush).
What you wanna do now is make sure the (Auto Mask) box is checked and adjust the brush size in the brush panel accordingly. Turning on (Auto Mask) will help you stay within the lines when painting over the teeth so that you won’t touch other parts of the face and it will speed up your workflow.
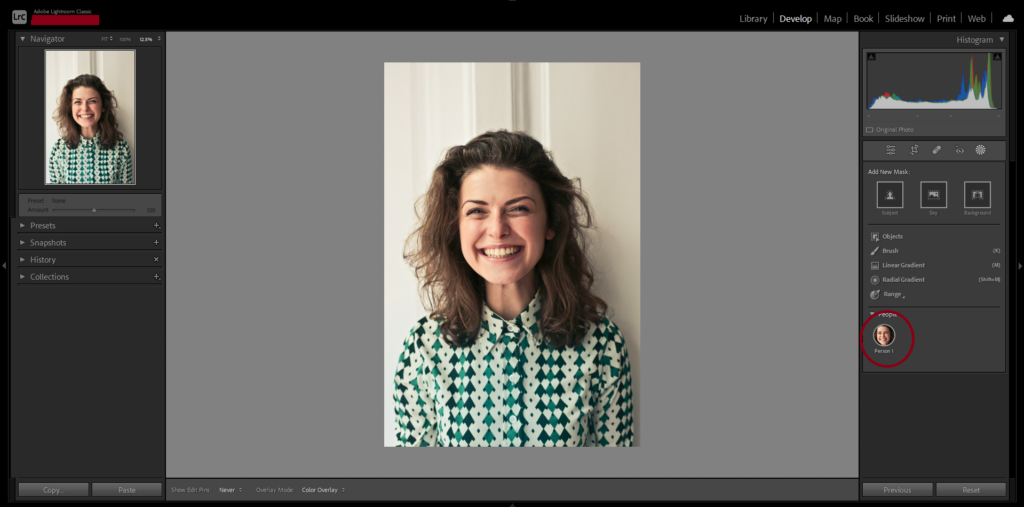
Using the AI feature
Firstly open up Lightroom and head over to the (Develop) module. Now click on the masking icon or use the keyboard shortcut (SHIFT + W). Now look down and you should see the face of your person with a piece of text under it that says (Person 1). Click on it and choose (Teeth).
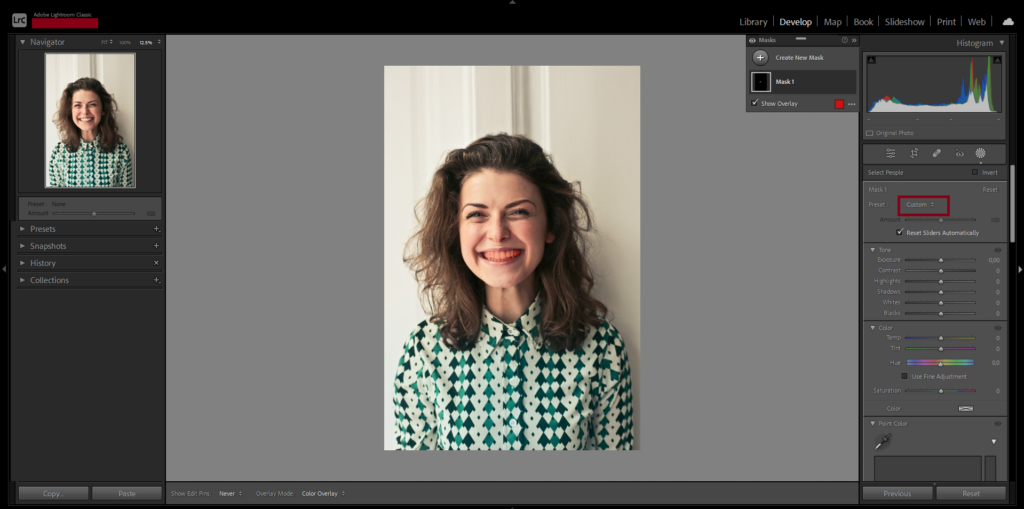
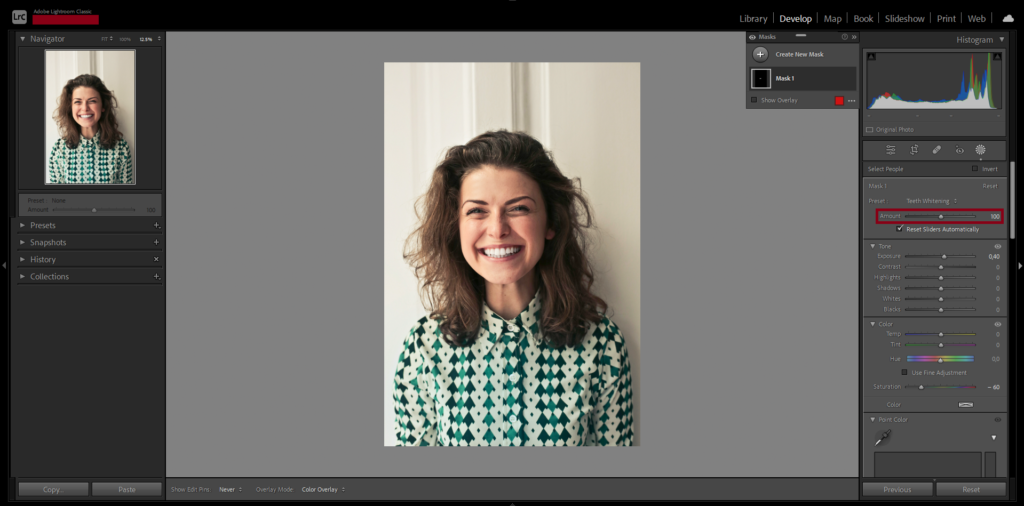
Step 2: Apply the teeth whitening preset
Now that the teeth are selected click on (Custom) and a drop-down menu will appear.
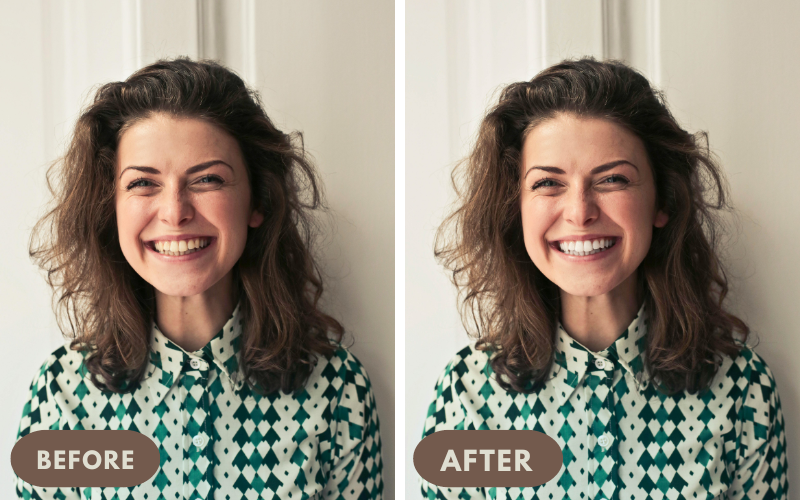
Pick the preset that is called (Teeth Whitening). As you can see the color of your teeth is now whiter.
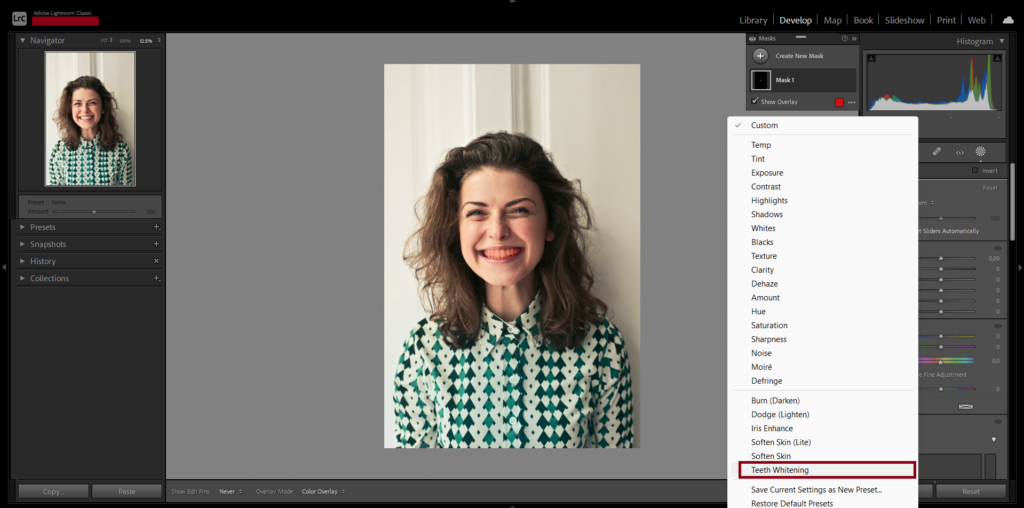
If you still see the red overlay on the teeth look at the (Masks) panel and uncheck the box that is called (Show Overlay). You should now see the change.
Step 3: Make further adjustments to the strength of the preset (optional)
The teeth might now not be exactly how you want them to be and if you want your teeth to look more natural or want even whiter teeth that is completely possible. You can do that by adjusting the (Exposure) and (Saturation) sliders.
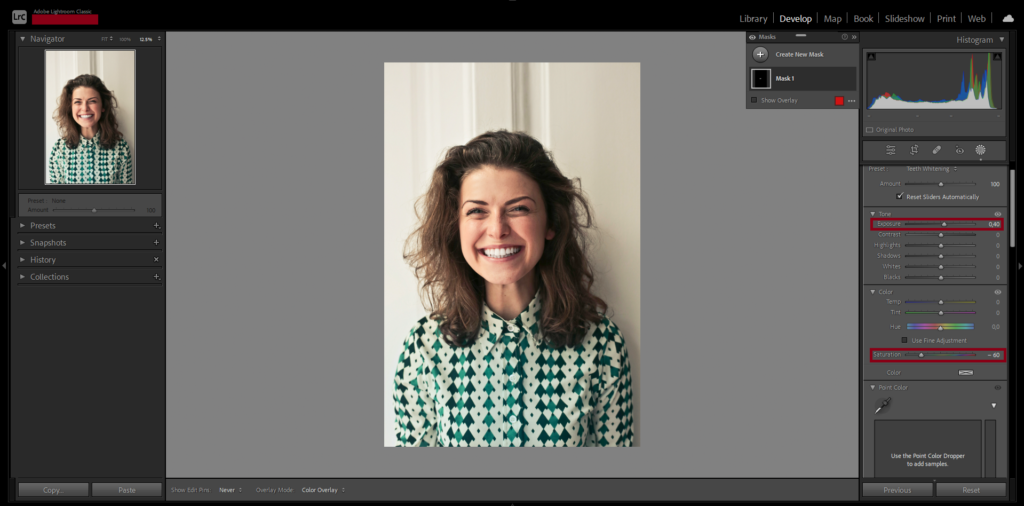
I won’t give you specific settings just play around a bit and see what settings fit your needs or the subject’s teeth the most.
What you also can do to change the look of your teeth is to adjust the white balance slider under the teeth whitening preset. I would do this rather than adjusting the (Saturation) and (Exposure) sliders.
Step 4: Take a closer look at the teeth (optional)
If you want to zoom in on the teeth to take a better look at them you can use the keyboard shortcut (CTRL + +) if you’re on Windows and (Command + +) if you’re on Mac. In the left corner of the Lightroom window, there is a picture the same one as yours but way smaller.
In that picture, you should see a white square. Use that square to know what part you want to see.
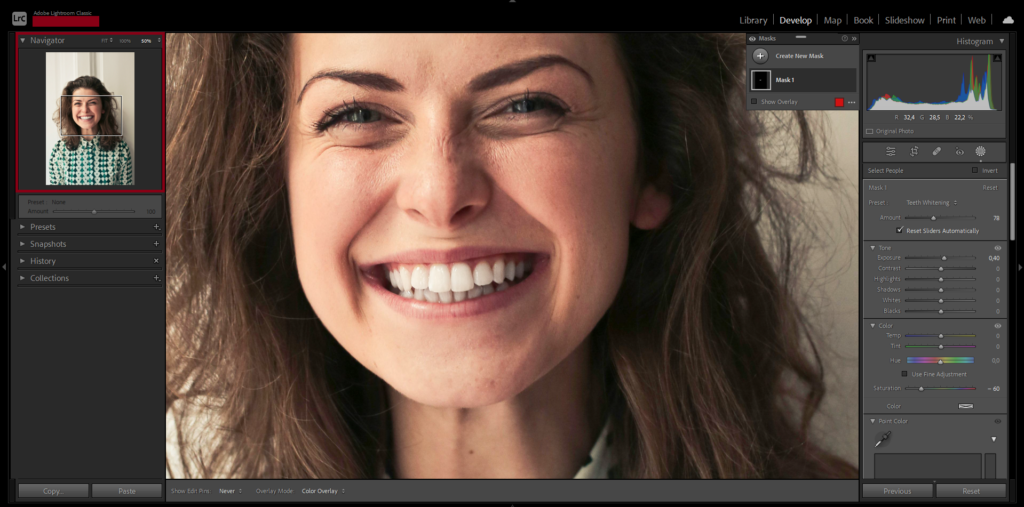
If you want to zoom out again use the keyboard shortcut (CTRL + -) if you’re on Windows and (Command + -) if you’re on Mac.
Final thoughts
First of all, I hope you now know how to whiten teeth in Lightroom. I know without someone guiding you this could be pretty challenging. That’s why I did my very best in trying to explain it to you in the easiest way possible and using easy-to-use tools in Lightroom.
Speaking about Lightroom I think we should be really grateful that they offer a built-in teeth whitener preset that can make teeth look very beautiful. Not many editing software programs offer that kind of luxury not even Photoshop.
If you want me to do a tutorial about how to get white teeth in Photoshop or you just want to see other tutorials like these. Read my other articles or contact me and we will figure something out. But yeah that was it for this article I hope you enjoyed it and I wish you the best.