In this tutorial, you will learn how to make a person’s skin smoother using 2 brilliant editing apps called Lightroom and Photoshop. Having clear skin in your photo is always nice to have whether it’s for a dating app, a company, an Instagram profile, whatever it may be.
You show people that you take care of yourself and live a healthy lifestyle. But in some scenarios, a person can have some pimples or acne, while living a healthy lifestyle. And that’s completely natural.
Or you ate something and the next you wake up and see that your face has gotten pimples. That can happen too. So if you need to take a really important picture and you want your skin to be clear, jump into the tutorial and find out how.
Should I use Photoshop or Lightroom to get smooth skin?
Before I wrote this tutorial I used both Lightroom and Photoshop to smoothen the skin of a person. From experience, I find smoothening skin from a person in Photoshop a bit harder and longer than doing it in Lightroom.
The reason for that is also pretty logical because in Photoshop you’re using more advanced tools compared to Lightroom. Still doing it in Photoshop is pretty easy and fast but compared to Lightroom in terms of time and difficulty Lightroom just wins by a bit.
But if we are talking about the end result I think that’s up to you. I would just use Lightroom and Photoshop and use the same person and see what end result you like the most. You can also check my end results.
How to make a person’s skin smoother in Lightroom
Step 1: Mask the face of the person
To get started open up Lightroom import the picture of the person to your library and head over to the (Develop) module. Now click on the masking icon or use the keyboard shortcut (SHIFT + W).

Now what you could do is click on (Brush) and paint over the face till it is masked but if you want to save time do this.
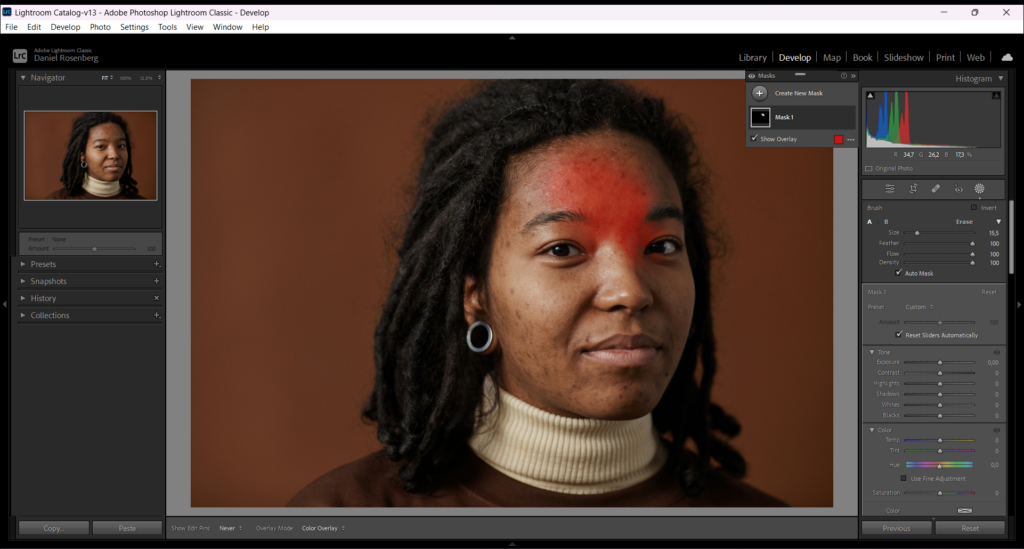
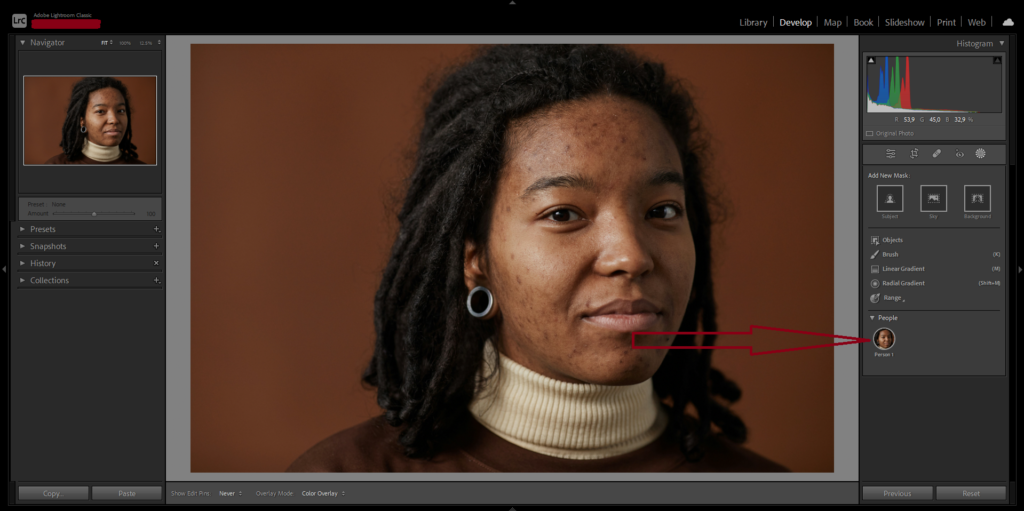
If you look all the way down you should see the face of your person with a text under it that says (Person 1) click on it and choose (Facial Skin).
Step 2: Adjust the Texture and Clarity
Now scroll down till you find yourself in the (Effects) panel and adjust the (Texture) and (Clarity) sliders. I suggest you just play around with it yourself and see what you like the most because my settings might not fit with your person.

You can remove the overlay by unchecking the (Show Overlay) box to see what changes you have made.

You can also adjust the (Sharpness) slider in the (Detail) panel if you want.
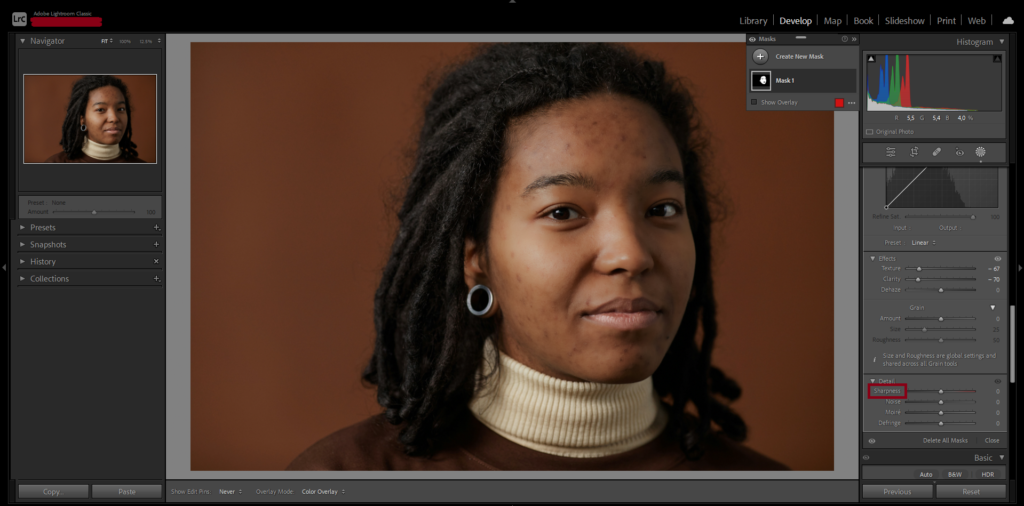
Step 3: Before and after
If you want to see a before and after look at the (Masks) panel and place your cursor somewhere on (Mask 1). Now a little eye should be visible to you click on it as many times as you want to see the before and after.

How to make a person’s skin smoother in Photoshop
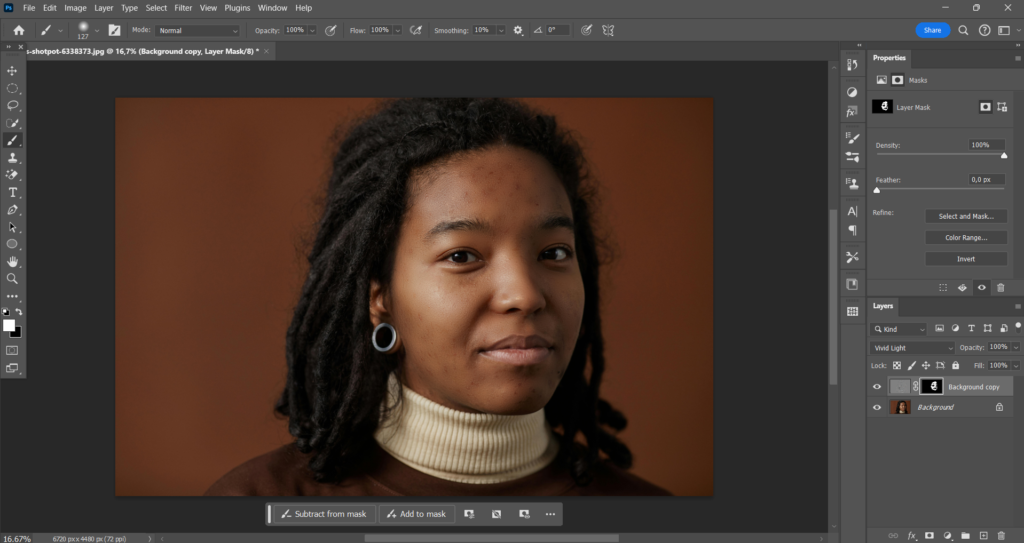
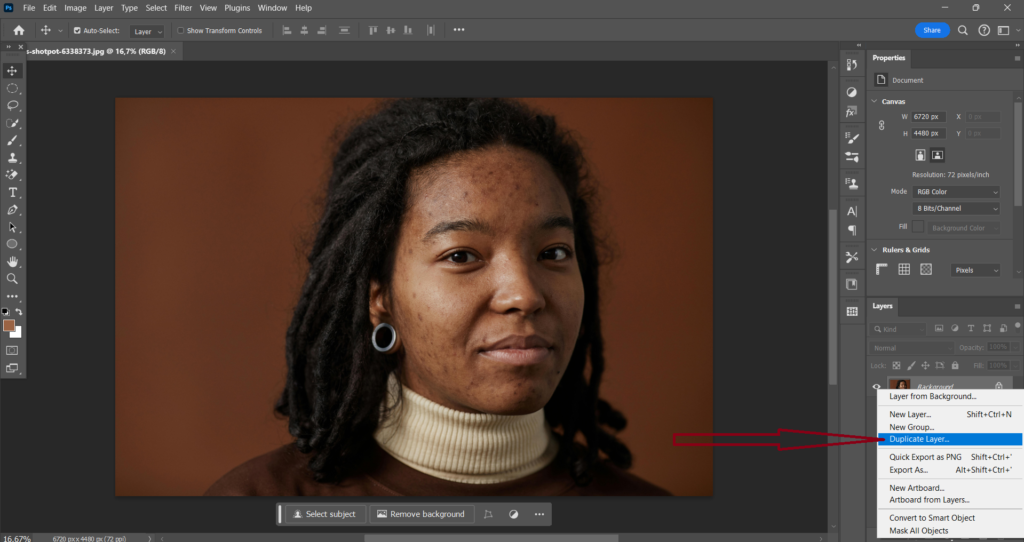
Step 1: Duplicate the layer
There are a few ways in Photoshop that you can use to duplicate a layer but the one I always use is just left-click on the layer and select (Duplicate Layer).
Step 2: Invert the layer
You can invert a layer by using the keyboard shortcut (CTRL + I) Windows or (Command + I) Mac.
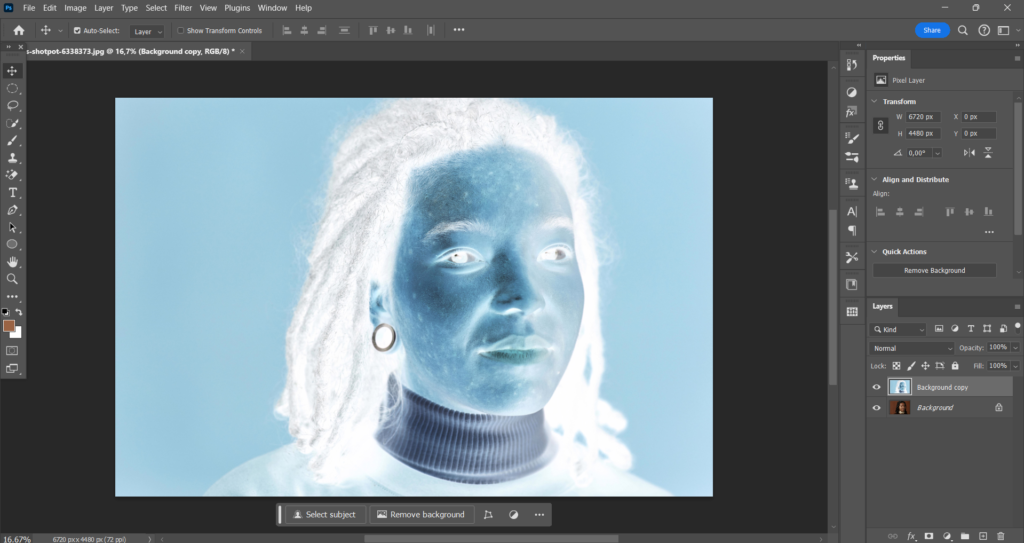
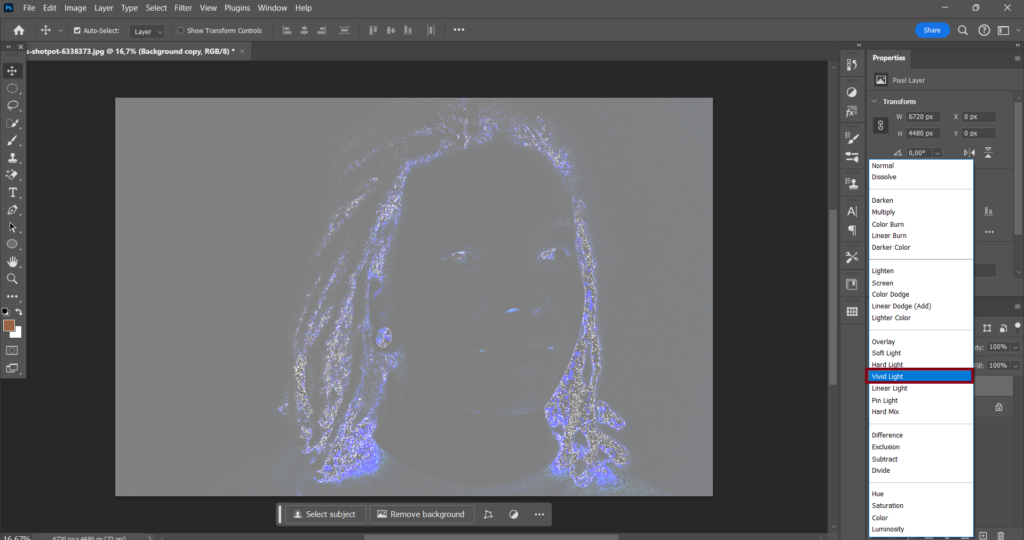
Also before we head over to the next step change the blending mode to (Vivid Light). You can do that by clicking on (Normal) and now a dropdown menu will appear and from there you can pick (Vivid Light).
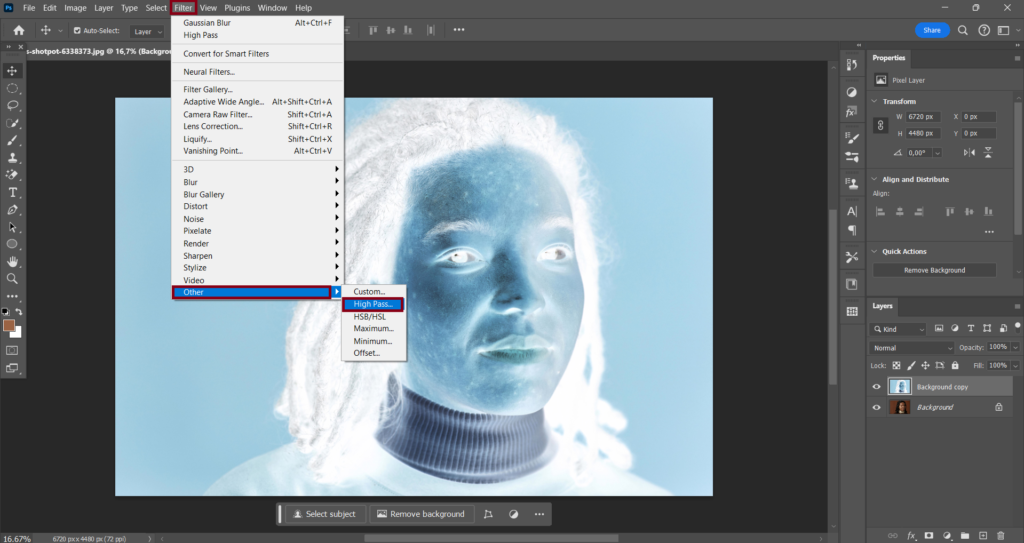
Step 3: Add the High Pass filter
Click on (Filter) in the top menu bar select (Other) and choose (High Pass). Now increase the Radius accordingly. For this picture, I’m going with (33,2).
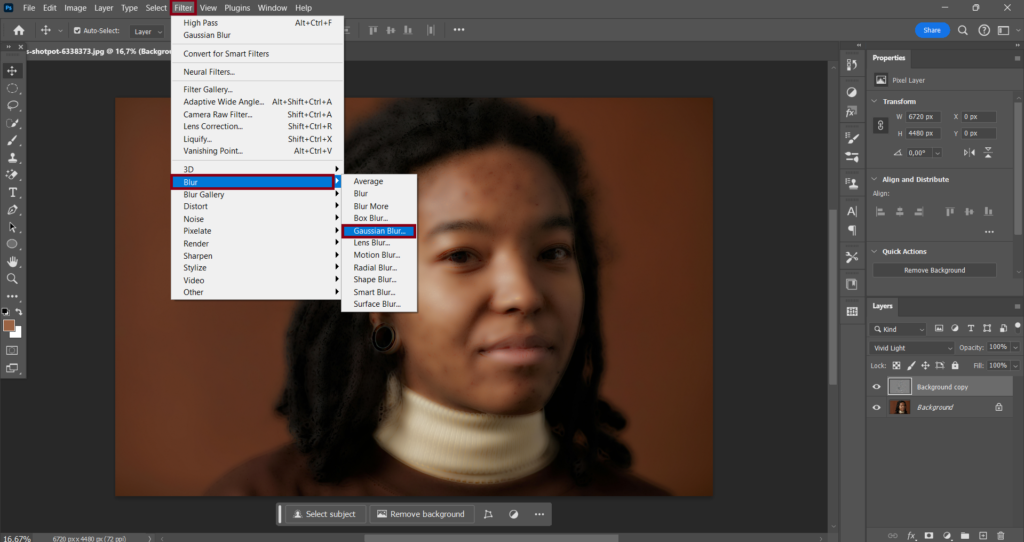
Step 4: Add the Gaussian Blur filter
Click on (Filter) again select (Blur) and choose (Gaussian Blur). Now increase the Radius accordingly. For this picture, I’m going with (7,2).
Step 5: Create a layer mask and invert it
Take a look under the layer section and click on the square with the round hole in it. Now use the keyboard shortcut (CTRL + I) Windows or (Command + I) Mac to invert it.
Step 6: Select the Brush Tool and make the skin smooth
Select the (Brush Tool) and adjust the size to your liking. Now make sure the foreground color is white.

I suggest you also zoom in on the picture for better vision. And now you can start painting over the areas that need smoothes.
If anything goes wrong press (CTRL + Z) Windows or (Command + Z) to undo what you just did.