Whether you’re a professional or just a beginner finding out how to rotate your photos in Lightroom Classic can be quite frustrating if you have never done it before. Fortunately for you in this tutorial, I have the answer you’re looking for and believe you really wanna know it.
Learning how to rotate an image in Lightroom can really be a game changer perhaps even your breakthrough. I know that can sound pretty overwhelming for such a thing as rotating photos but it’s really true.
Almost every photographer in their lifetime will come across a moment where they will have to take a shot in an awkward position and have to rotate it for it to be perfect. And that’s just one scenario of why you’ll want to know how to flip a photo around using Lightroom.
There are countless other problems out there that can only be solved by knowing this. So if you came into this tutorial questioning if it’s even worth spending time learning it I think that question is answered for now. So let’s jump right into the main question where you came for how to rotate an image using Lightroom Classic.
How to rotate a photo in Lightroom Classic using 3 methods
Method 1
Method 1 is one of the fastest and easiest ways that you can use if we are talking about rotating photos in Lightroom. It’s fast and easy and does the job so let’s get a deeper look into this.
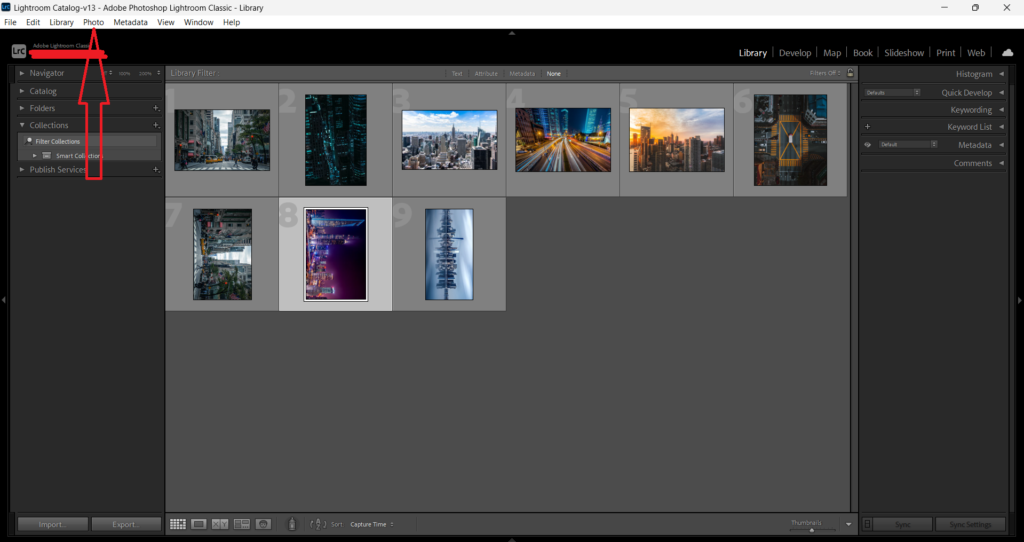
Firstly you will have to open up your Adobe Lightroom Classic application and navigate to the (Libary). Once you’re there you will have to change the Libary’s format to (Grid View). Now you should see all your photos but in thumbnail form.
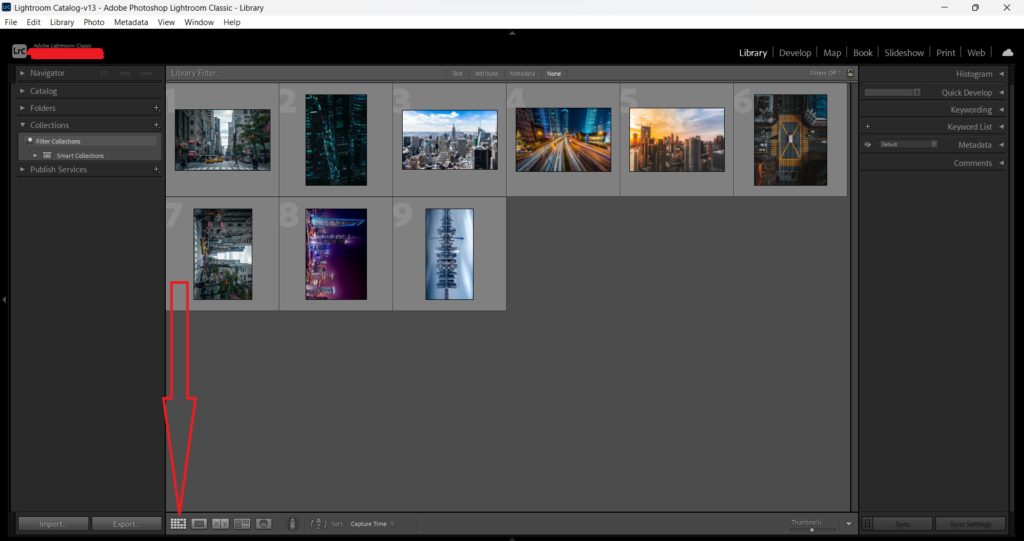
- A quick tip: Before I’m going to tell you how to rotate your image I would like to share a quick tip with you that can save you a lot of time. If you need to rotate multiple images to save time listen up. To select multiple images hold down (SHIFT) and select the desired images
Place your mouse on one of the image thumbnails and two arrows will appear. One on the right side and one on the left side. If you click on the arrow on the right side the photo will rotate clockwise and if you click on the arrow on the left side the photo will rotate counterclockwise.
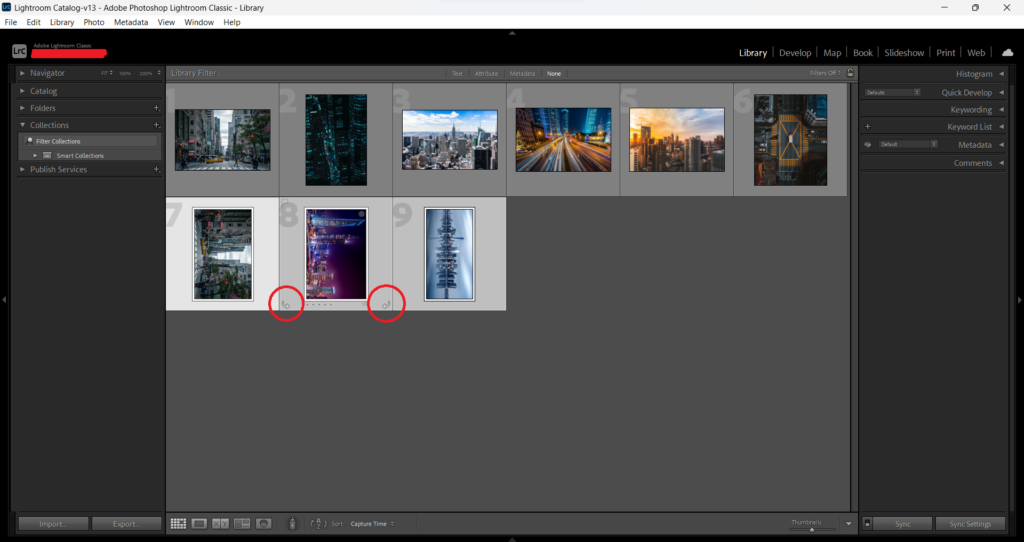
And every time you click on one of the 2 arrows the photo will rotate 90 degrees in that direction.
Method 2
I’m aware that some Lightroom users would also like to know how to flip an image horizontally and vertically. That’s why I have put a method together that will still teach you how to rotate a photo but also how to flip a photo in Lightroom.
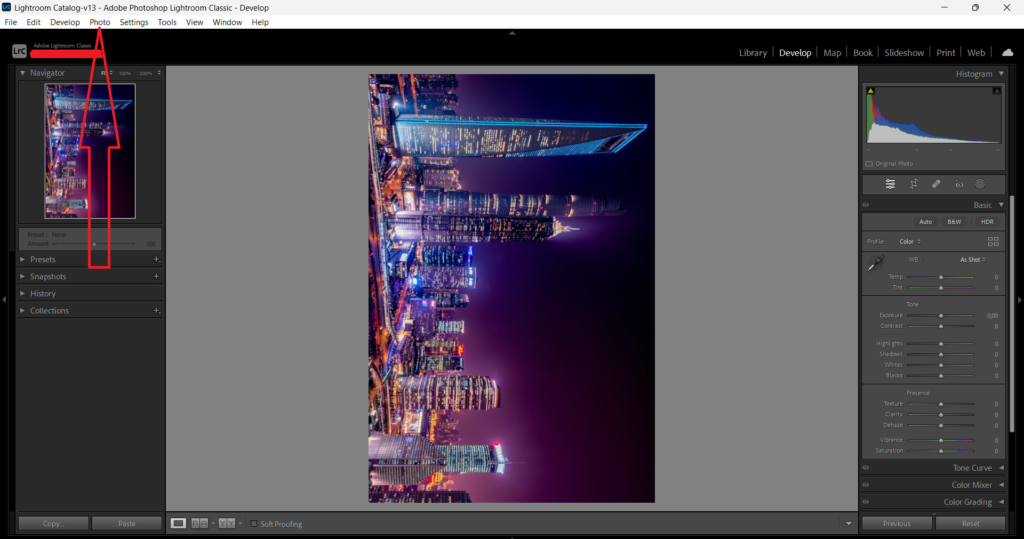
To get started open up Lightroom Classic and head over to the (Library) module. Once you’re there look at the top menu bar and click on (Photo). Now several options will appear including the rotating and flipping settings.
- Rotate Left (CCW) means the photo will rotate clockwise
- Rotate Right (CW) means the photo will rotate counter clockwise
- Flip Horizontal means that the left side of the photo will become the right side and vice versa.
- Flip vertical means that the photo will appear upside down with the top becoming the bottom and vice versa.
I also want to mention that you can also access the top menu bar in the (Develop) module which means that you can also rotate the image in the workplace using the top menu bar.
keyboard shortcuts
Personally, I don’t think using a shortcut is really necessary because doing this manually is already pretty fast but if you’re a person that wants to quickly rotate images so that you can save yourself as much time as possible I won’t stop you. Here are the shortcuts,
- Use the keys CTRL + [ or Command + [ to rotate the photo to the left.
- Use the keys CTRL + ] or Command + ] to rotate the photo to the right.
Method 3
I have added this last method to my post for Lightroom users who want to rotate their photos less than 90 degrees. To be more clear with you let’s say you added a photo to Lightroom or made one and you watch it back and see that the photo is just a few degrees away from being perfectly straight.
You won’t be able to fix that using the other two methods in my post because those two will only help you with rotating an image 90 degrees. That’s why I have put a method together that can straighten a photo the way it needs to be.
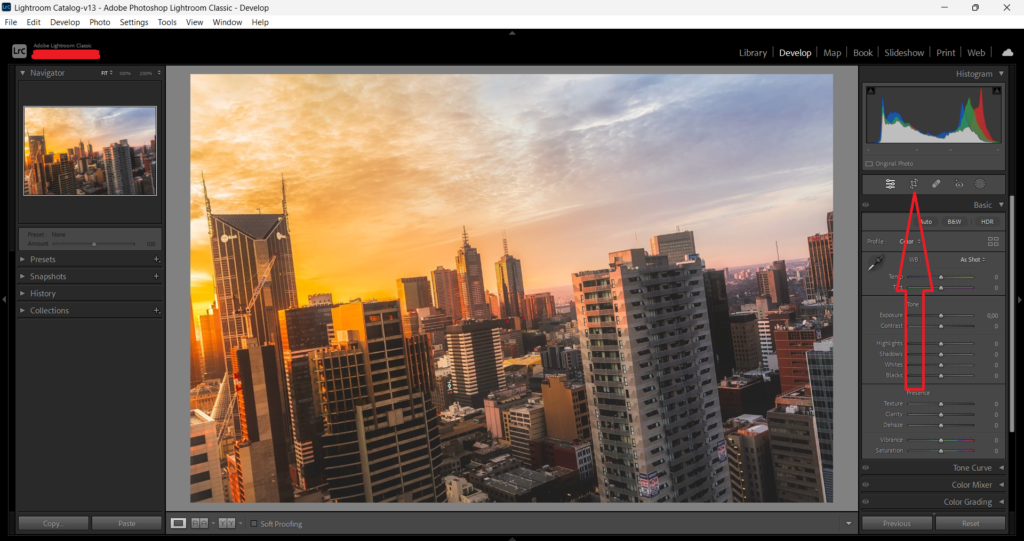
Firstly you will need to open up Lightroom CC and navigate to the (Develop) module. Once you’re there look at the toolbar under the (Histogram) panel and select the (Crop Overlay tool) (You could also press R on your keyboard)
In the (Crop And Straighten) panel you should see a slider with the word (Angle) next to it that is your straightening tool.
To straighten the image to your liking you can either adjust the slider or put in a specific number in the box next to the slider. While you’re doing that you could also use the (Crop tool) to cut a specific part of your image because that tool is now also activated.
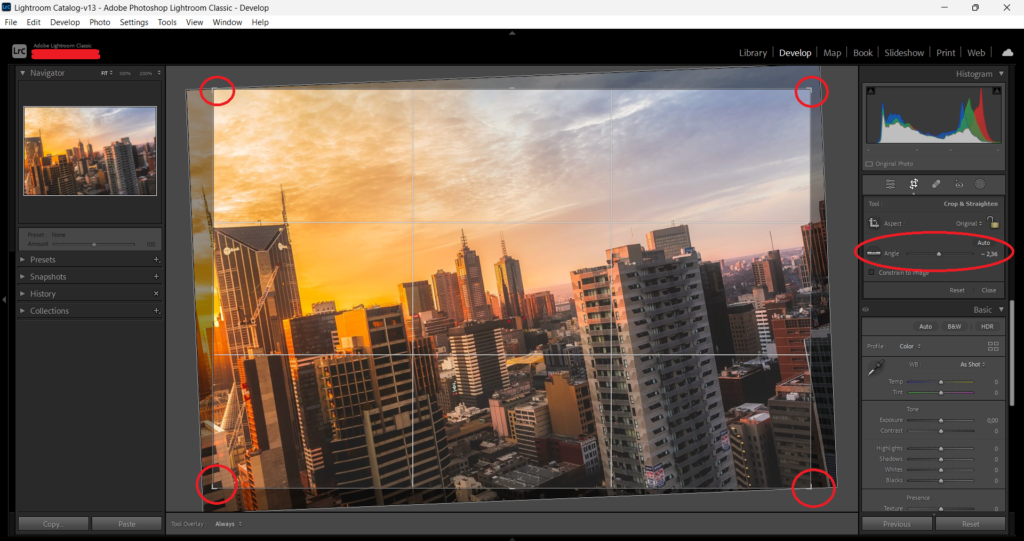
If anything went wrong or you regret the decision you made you can always click on Reset under the slider to undo the change you have made.
Final Thoughts
Here you are at the end of the blog post and while you’re here I want to share my last thoughts with you before ending it. Firstly I hope you now know how to rotate and straighten photos in Lightroom Classic CC. Personally, I think it was a very easy tutorial thanks to the amazing Lightroom interface. Speaking about amazing interfaces if you want me to make a tutorial about this but then in Photoshop feel free to reach out to me. But yeah apart from that I’m happy I could have helped you solve this problem today and I wish you the best stay safe.