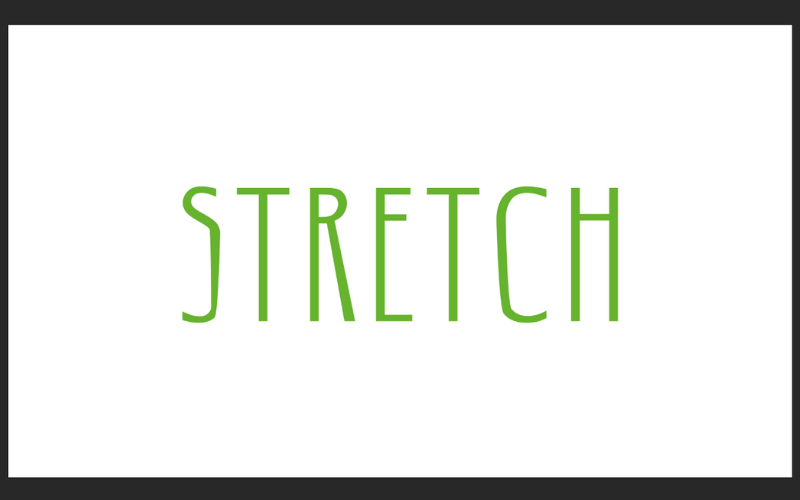
Learn how to create a stretch text effect in Adobe Photoshop using my tutorial. Using this text effect in Photoshop can make such a difference in terms of creativity and competition. So there is a high chance if you use this effect you stand out in whatever you do unless you live in a world where ugly projects are appreciated. So let’s take a look at how to get this effect in Photoshop.
How To Stretch Text In Adobe Photoshop: Method 1
Step 1: Adding text to the canvas
1. To get started you will first need to add text to your canvas. To do this open up Photoshop and create a new new document in Photoshop or use a previous one.
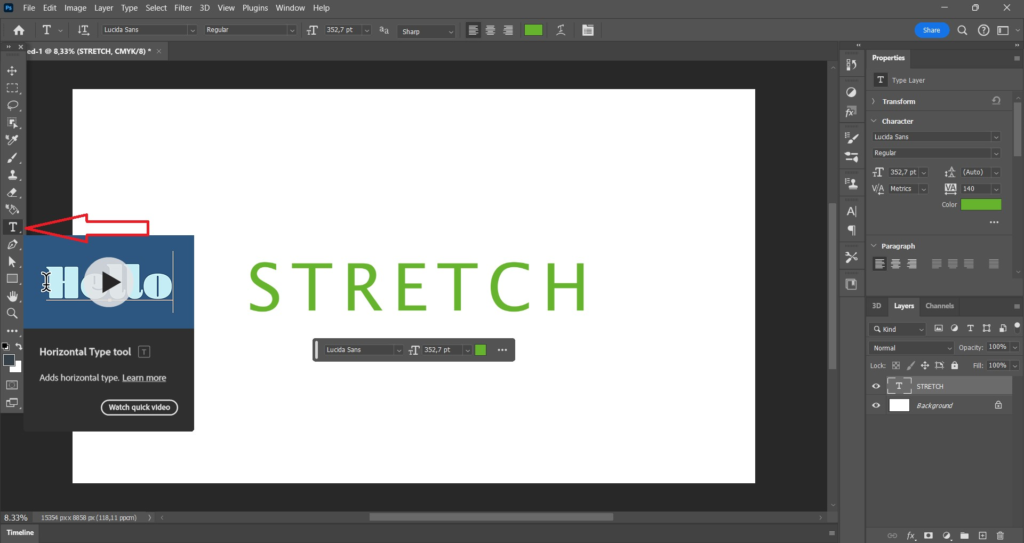
2. Click on the (type tool) choose (horizontal type tool) and click anywhere in the canvas to add text. And make your text appealing I mean text without a nice font or effect or color looks a bit boring so just do what you’d like.
Step 2: Converting the text to a shape
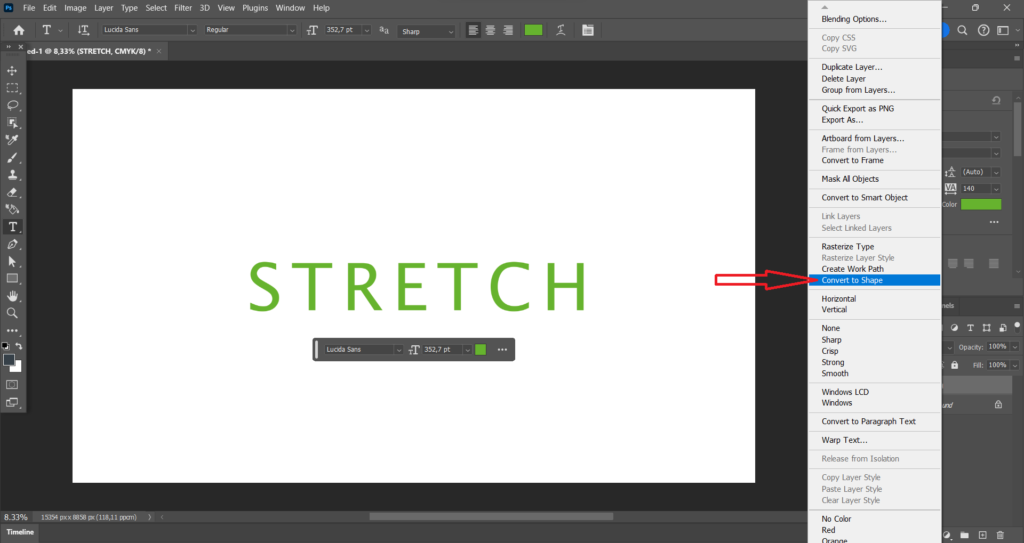
1. If the text is added make sure the text layer in the layers panel is selected and (right-click) the text layer and click on (Convert to shape).
Step 3: Using the direct selection tool
1. If you converted the text into a shape take a look at the toolbar and click on the icon with the cursor on it. (Right-click) the the icon with the cursor on it and make sure the (direct selection tool) is selected not the (Path Selection tool).
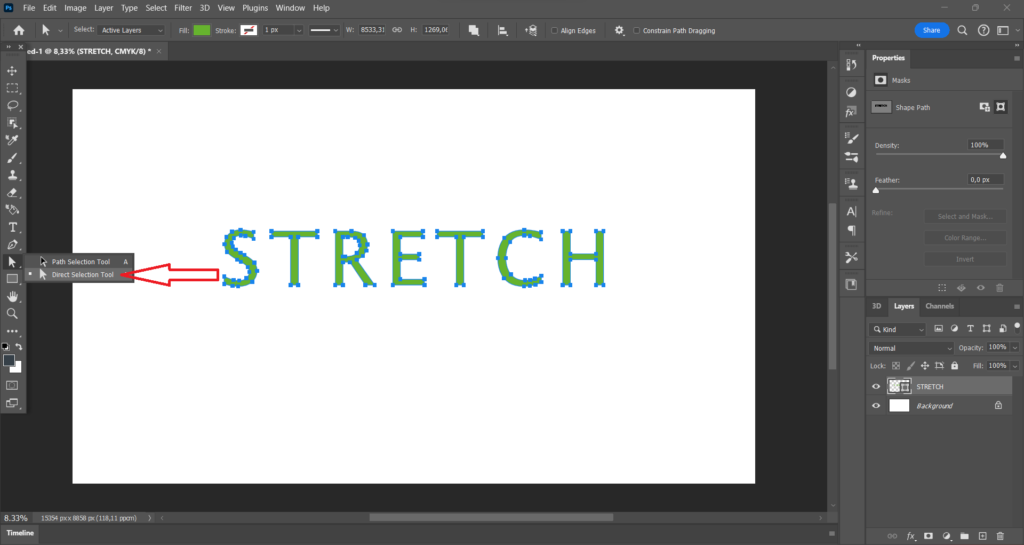
2. With the (direct selection tool) you can make a selection. So just click and drag and whatever is in that selection box you made you can stretch.
3. So if you want that classic stretch look where your text is stretched down make a selection on the whole text but only the bottom section of the text.
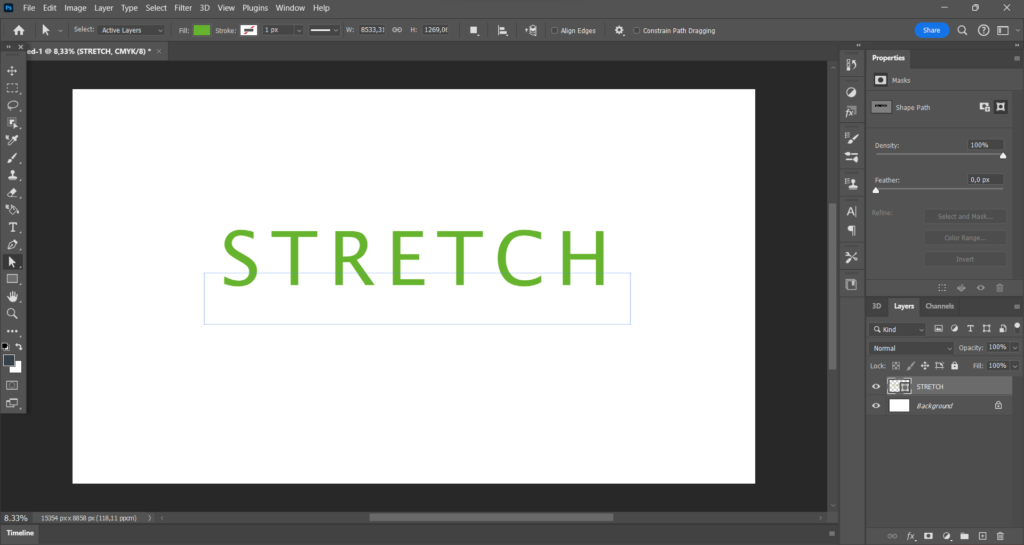
4. Click on one of the blue Anchor points doesn’t matter what anchor point, and drag it down. If you hold down the (SHIFT) key while dragging it will help keep the text perfectly straight.
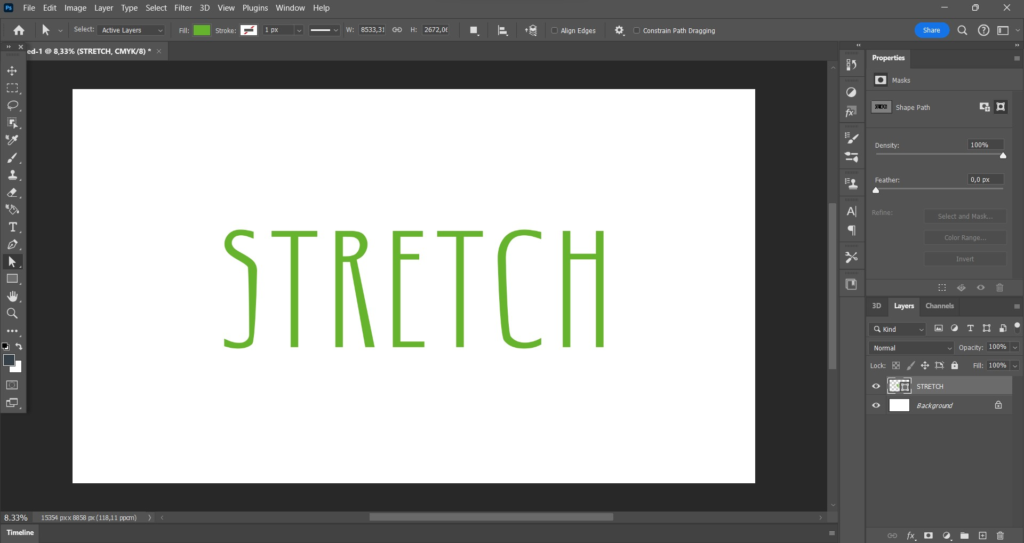
5. But of course you don’t have to stretch the text like I just did you can also just make a selection around one letter and stretch that letter or only stretch 3 or 4. Just create interesting and eye-catching stretch ideas that you think will stand out.
Method 2
Step 1: Converting the text to a smart object
1. To get started you will first need to convert the text to a smart object. But first, make sure you added text to the canvas in method 1 Step 1 I talk about how to add a text box to the canvas.
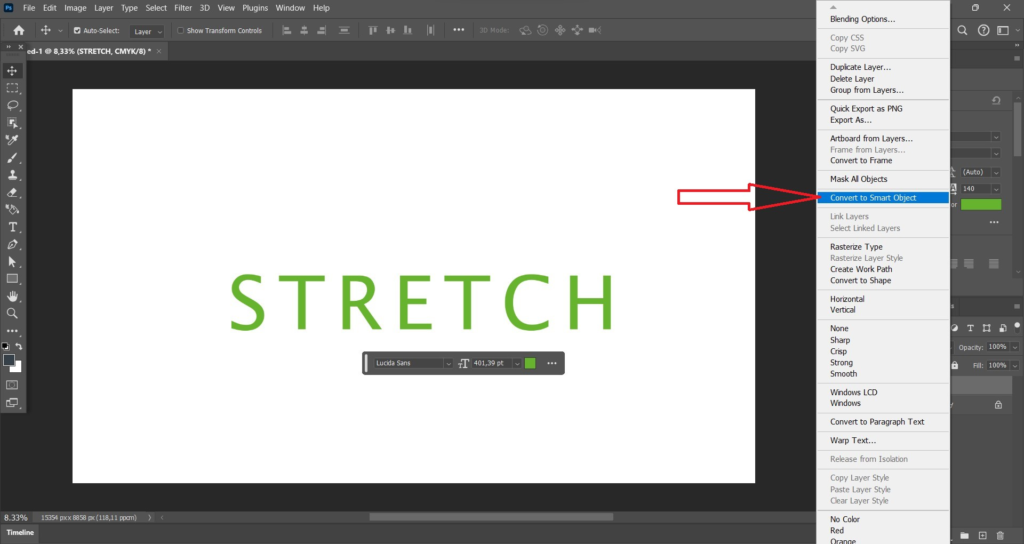
2. If the text is added make sure the layer of the text in the layers panel is selected (right-click) the text layer and click on (Convert to Smart Object).
Step 2: Activating the free transform tool
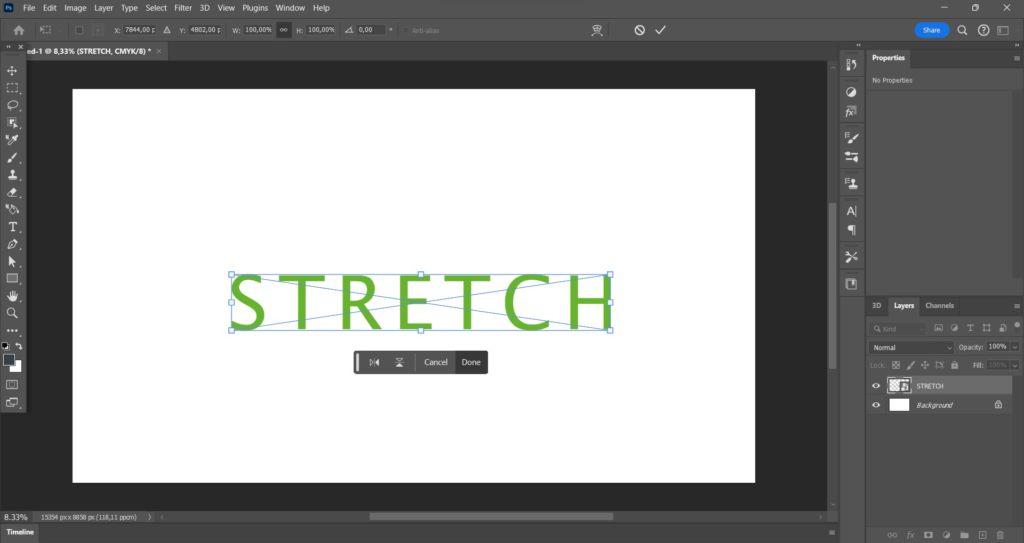
1. Use the shortcut on (CTRl+T) or (Command+T) to activate them. You will know if the transform controls are activated if squares appear around your text.
Step 3: Using the wrap tool
1. Now (right-click) your text and click on (Warp) and blue dots will appear around your text.
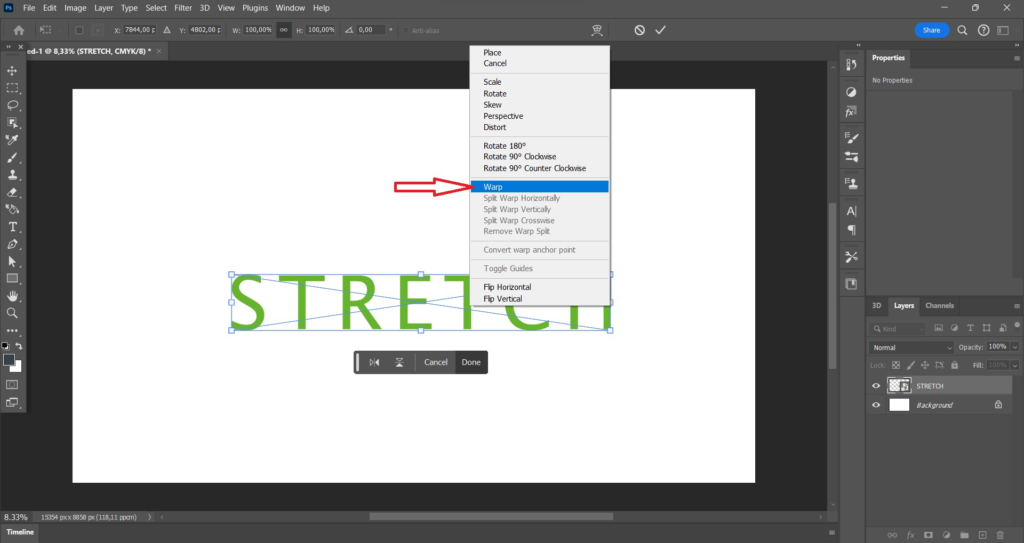
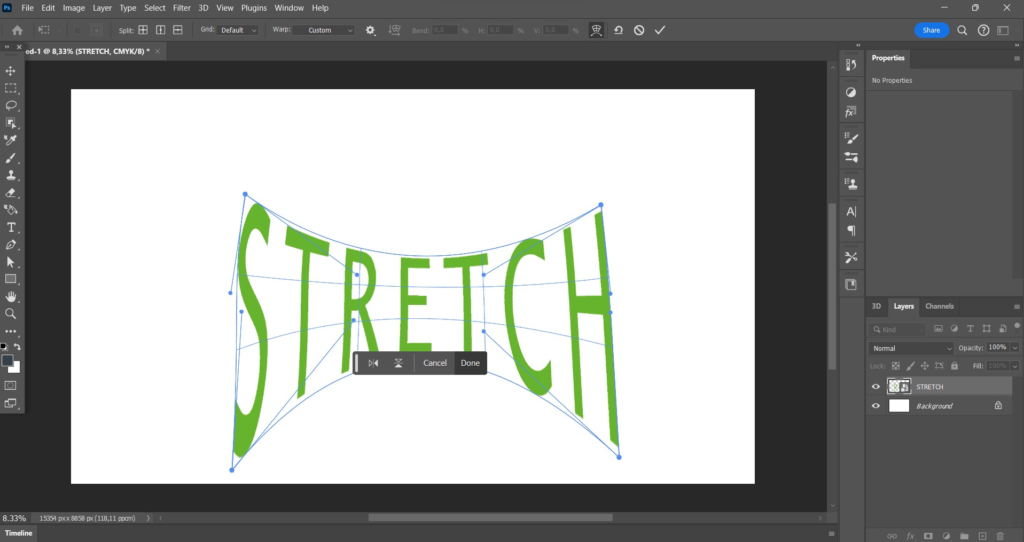
2. click and drag the dots to stretch the text. But the dots are not really connected to each other so let’s say you drag one dot if you do that that particular area of the text will be stretched. So there are many ways to stretch your text using the (wrap tool).
FAQ
Can I still edit the text after I stretched it?
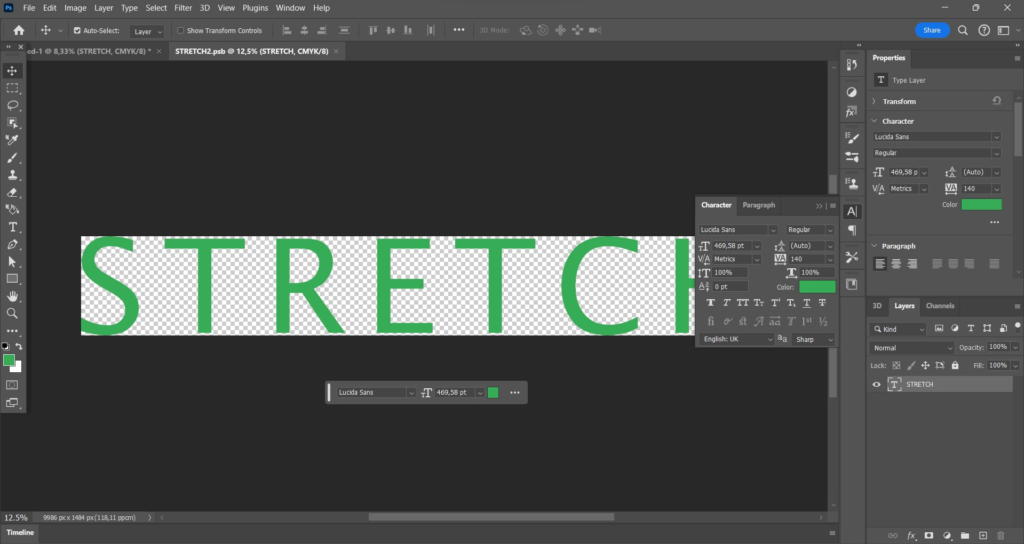
Let’s first talk about this using Method 2. First, select the layer of your text that is now a smart object. Now (double-click) the box in the layer with white and black squares in it. You could also see your text in that box if your text is big enough. After you (double-click) it you can now use the (character toolbar) to resize your text or add a new font or you want to add a different color just those kinds of things.
But in method 1 if you (double-click) the box with white and black squares it seems to me you could only change the color of the text. I still haven’t figured out how to do it and I do not even know if it’s even possible to do it in Photoshop. So if you do know how to do this or know more about it please contact me or do more research on Google.
Do you have any tips and tricks?
Well in method 1 if you hold down (SHIFT) while dragging an anchor point Photoshop will help you with dragging a straight line so if you have a shakey hand Photoshop has your back. I also have a great tip that can help you get a better-looking stretch effect. And that tip is adjusting the spacing of the text. It could be that your text is very close to each other and then if you stretch it just looks a bit like the text is melting. Personally, I don’t like that and I think a lot of people like the effect more if there is more spacing between text.
To fix this take a look at the (character toolbar) and next to the icon with the letters V and A in it, you can change the spacing between the text. I always like to use 140 or 180 But you can choose whatever you’re happy with.
Can I Stretch text horizontally and vertically?
Yes, in Photoshop you have the choice to stretch your text horizontally or vertically in both 2 methods. But not only horizontally and vertically you can stretch your text however you want to.
Final Thoughts
First of all, I want to say if you read all the way from the beginning till here I think it’s pretty safe to say that you now know how to stretch your text in Photoshop and know all the insights about it because of my 2 methods. I tried to make the steps as easy as possible so that no problems or irritations affected you. But if it did and you do not know how to get this effect in Photoshop but still really want to stretch your text. I suggest you do more research on Google I’m pretty sure there are some other Photoshop tutorials out there that could help you. But if you do know how to get this effect I’m happy I could have helped.


