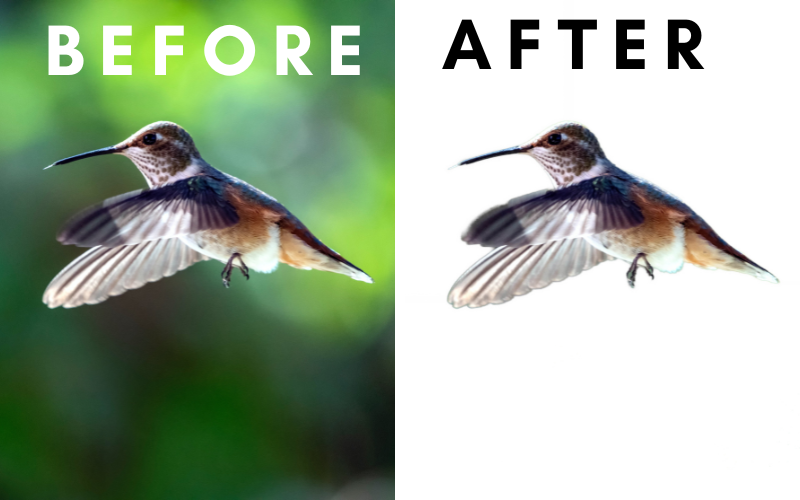
Are you having a hard time removing the background of your photos in Lightroom? Well, that stops today because, in today’s tutorial, you will learn how to remove backgrounds using Lightroom. Knowing how to remove the background of a photo is a key factor that every photographer or photo editor should know. So let’s not waste time and get right into this.
How to remove background in Lightroom using an AI tool
Personally, I like this method the most because first of all from what I know this is the fastest and easiest method out there at the moment. Second of all in this method, we will be using an AI tool to remove our background. But not completely the AI tool will do around 80 percent of the work.
Step 1: Find the AI tool
To get started open up your Adobe Lightroom Classic application and select the image you want to remove the background from. After that navigate to the Develop module and look at the toolbar under the Histogram panel.
There are two ways that you can use to reveal the AI tool. The first one is by clicking on the masking icon. The second one is by using the shortcut (Shift + W).
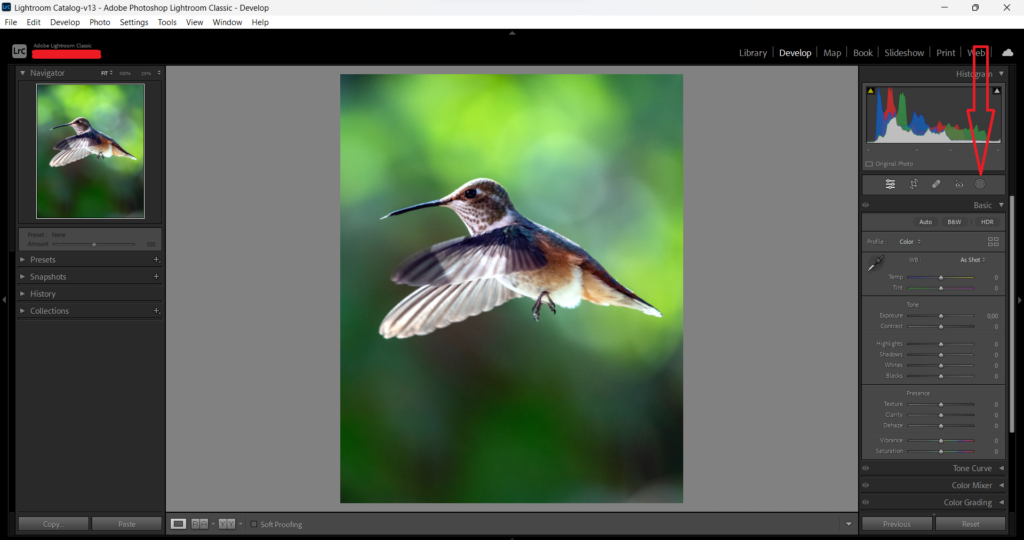
Now 3 AI tools will pop up. The AI tool that will help you today is called (Background).

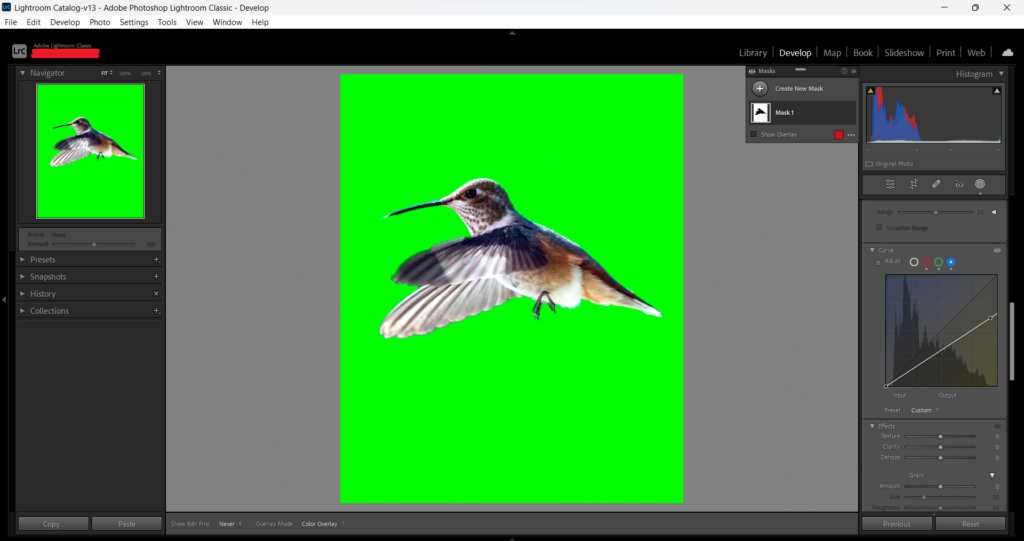
Step 2: Select the background
Now that you found the background AI tool you’ll now have to mask your background. To do that just simply click on the AI tool and it will automatically select the background for you.
Step 3: Remove the background
At the moment there is no official background removal tool available in Lightroom that users can use to remove their backgrounds. But that doesn’t mean it’s not completely impossible to do. Remember Lightroom is a well-crafted photo editing application that can turn the impossible into possible.
With all the intelligent editing features that Lightroom offers, we can still make it happen. You see although we can’t fully remove the background we can change the background color to your liking.
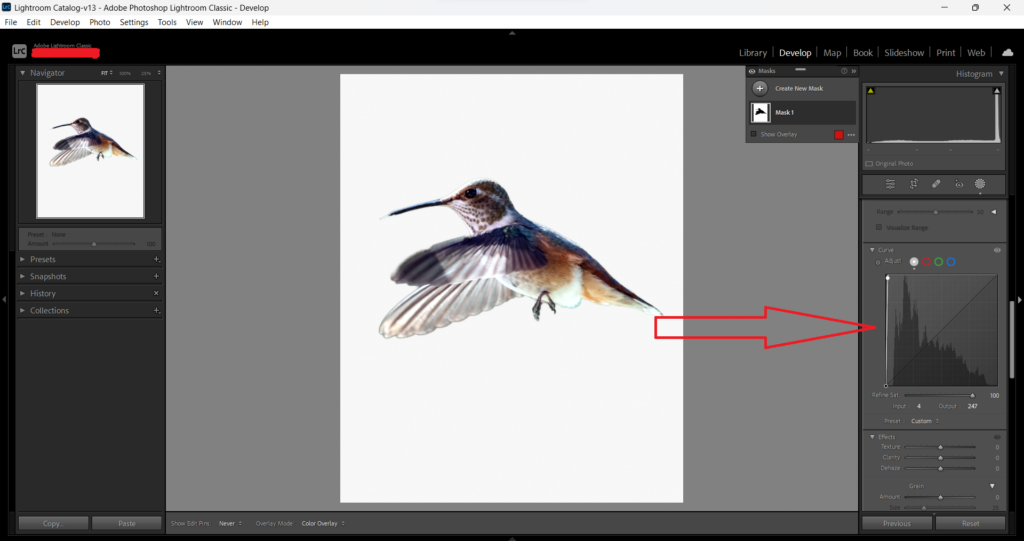
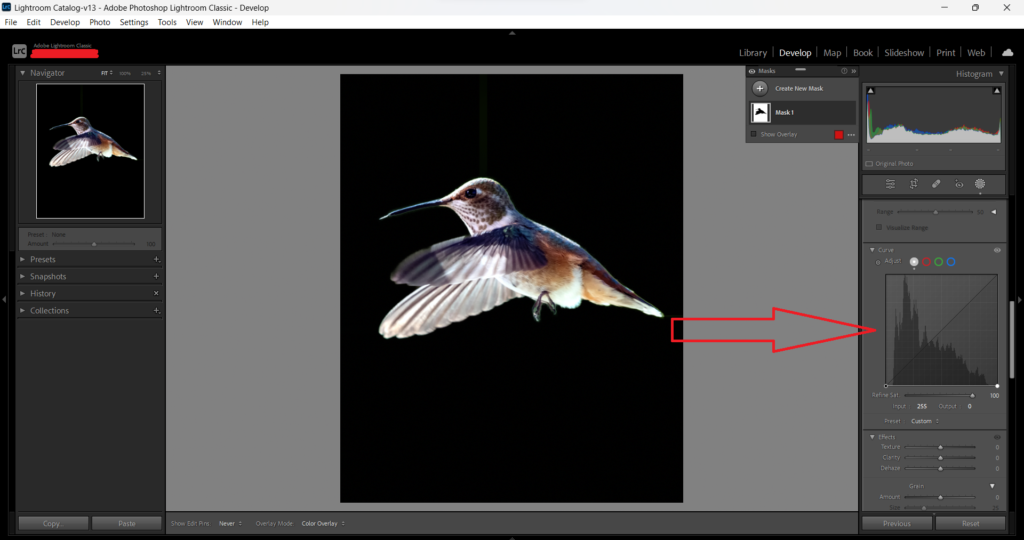
In most cases, a person would want a black or white background so what you wanna do is scroll down till you find the curve panel. If you want your background to be white drag the little circle in the top right corner to the top left corner.

And if you want a black background drag the little circle in the bottom left corner to the bottom right corner.

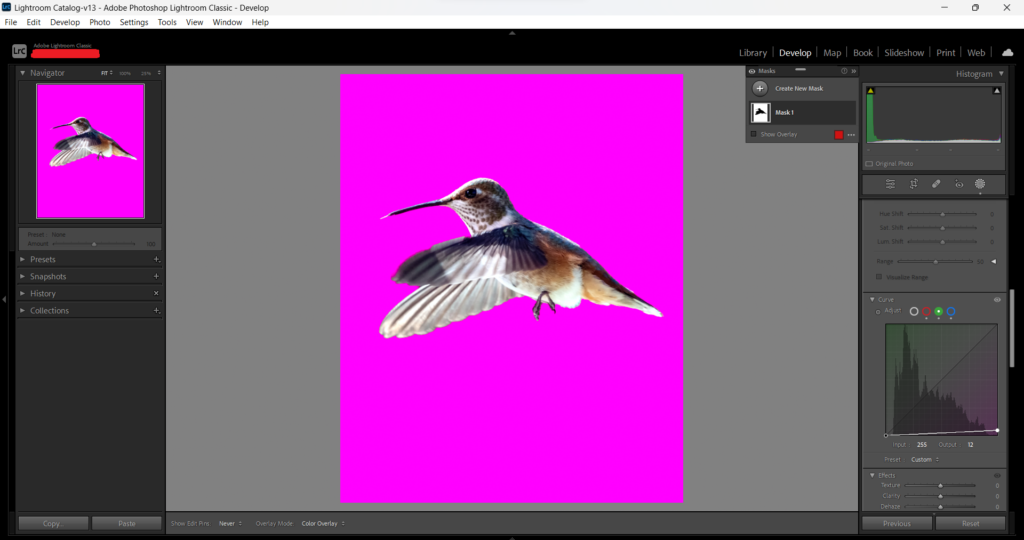
In the curve panel, you can also make up different colors for your background. As you can see in the image here below I gave the background the color green.
How to remove background in Lightroom using the adjustment brush tool
If the first method was not working out for you it is probably because you have a complex background and the AI tool could not detect the difference between your background and the subject. If so this method can help you much more because this method is more on the manual side.
Step 1: Find the adjustment brush
First, open up Lightroom and import the image that you want to remove the background from. Now navigate to the develop module to open the image and press K on your keyboard to open the brush panel and all the adjustment settings.
Step 2: Mask the background
Before we do that it might be smart to take a look at the brush settings and see if they match so that when you start painting you don’t select the subject. You can do that by adjusting the feather, size, flow, and density of the brush.
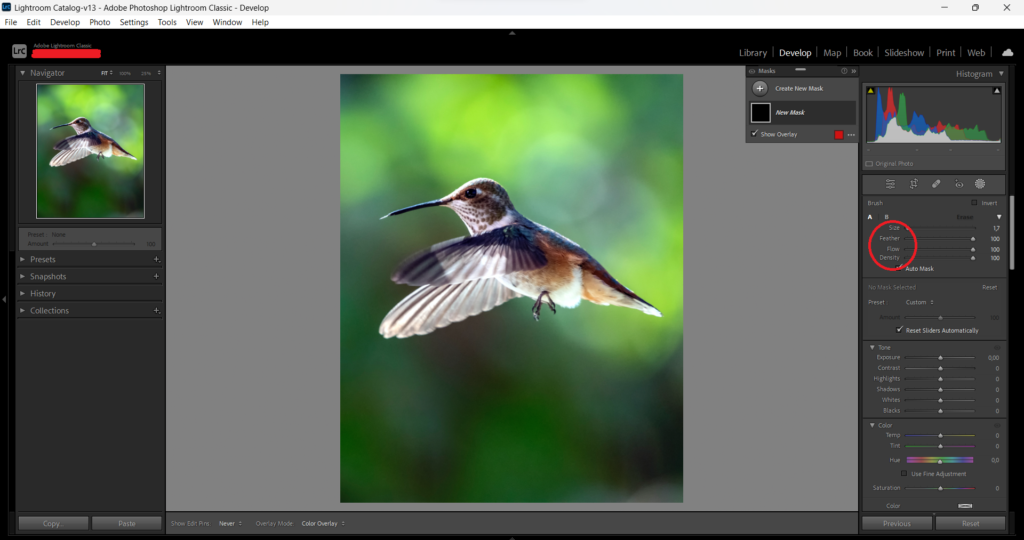
What you also can do is turn on the auto mask option. This can help you when you refine the edges of the subject.
You’re probably thinking right now why would I paint over the subject well some users paint over the subject first and then click on invert so that the subject is not selected anymore and everything else in the photo now is.
I would say do what you want as long as the background is masked before we head into the next step.
But if something goes wrong while masking and you want to erase a spot you can use the eraser tool to remove that. You need to click on the word Erase in the brush panel to activate it. Don’t forget to zoom in on the photo for better precision.
Step 3: Remove your background
Lightroom has no official feature yet that can start removing the background for you or save the image as a transparent background. But that doesn’t mean it’s not completely impossible to do. Remember Lightroom is a well-crafted photo editing application that can turn the impossible into possible.
With all the intelligent editing features that Lightroom offers, we can still make it happen. You see although we can’t fully remove your background we can change the background color to your liking.
scroll down till you find the curve panel. If you want your background to be white drag the little circle in the top right corner to the top left corner.
And if you want a black background drag the little circle in the bottom left corner to the bottom right corner.
In the curve panel, you can also make up different colors for your background. As you can see in the image here below I gave the background the color purple.
Final thoughts
Firstly I wanna say that I hope you now know how to master background removal in Lightroom. I know it can be pretty challenging to remove a background in Lightroom without anyone guiding you through the process. So I tried to make this blog post as easy as possible. If you’re still not satisfied with what I taught in this post feel free to reach out to me and I will make a new tutorial but then use Photoshop to teach you how to remove your unwanted background.